VIGI Cloud VMS - Getting Started
Summary:
Quick guide to setting up a TP-LINK VIGI Cloud VMS Account
Step 1: Visit TP-Link VMS Site
Navigate to https://vms.tplinkcloud.com/
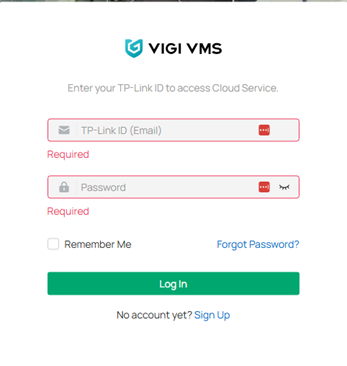
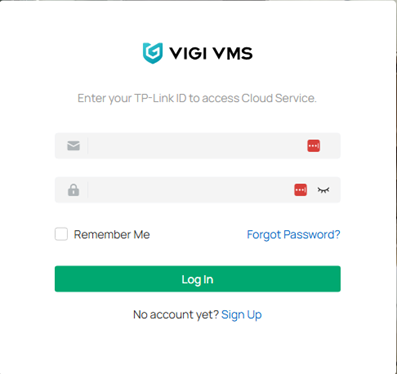
Step 2: Log In or Register
Fill in your TP-LINK login details, then click Log In. If you do not already have a TP-LINK ID, click the Sign Up link.
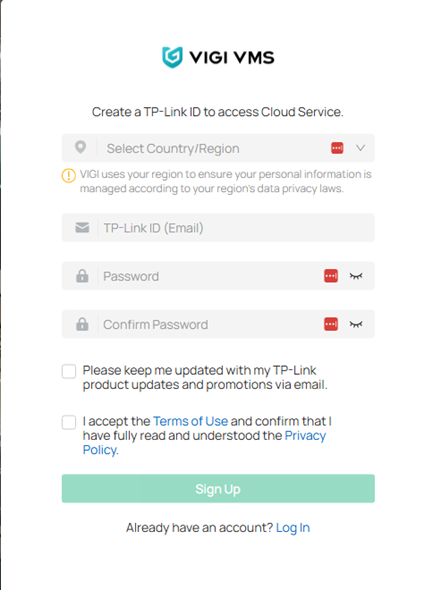
Fill in the required fields & Accept the Term of use check box, then click Sign Up.
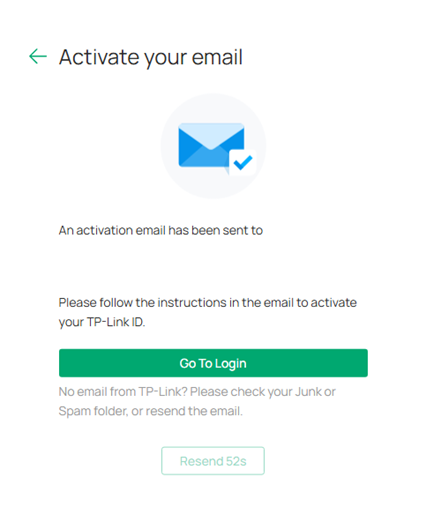
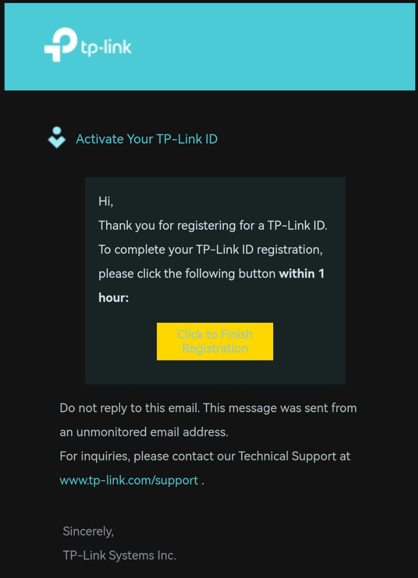
Check your email for the Activation Link and select the Click to Finish Registration button
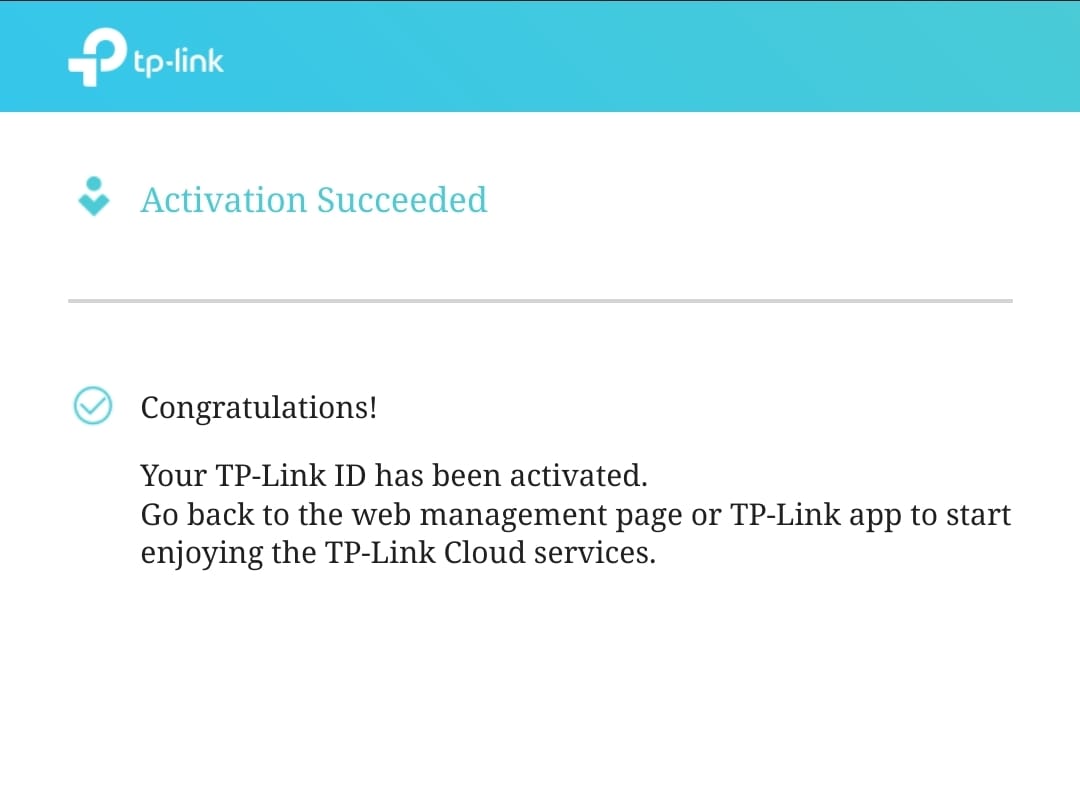
Return to the Login Page, fill in your details and Log In
Step 4: Organization & Site Setup
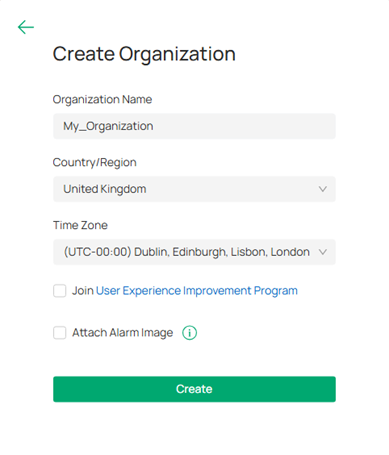
On your initial Log In you will be prompted to create an organization, complete the fields and select you region, then click Create
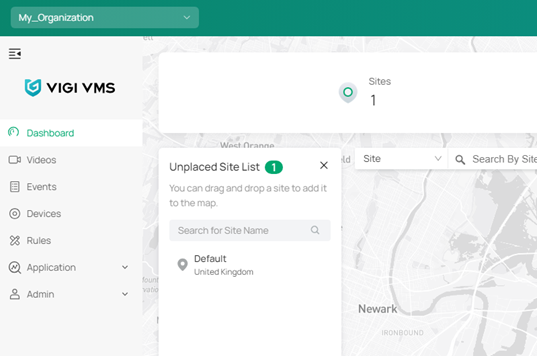
Once the Dashboard is loaded select the Sites button
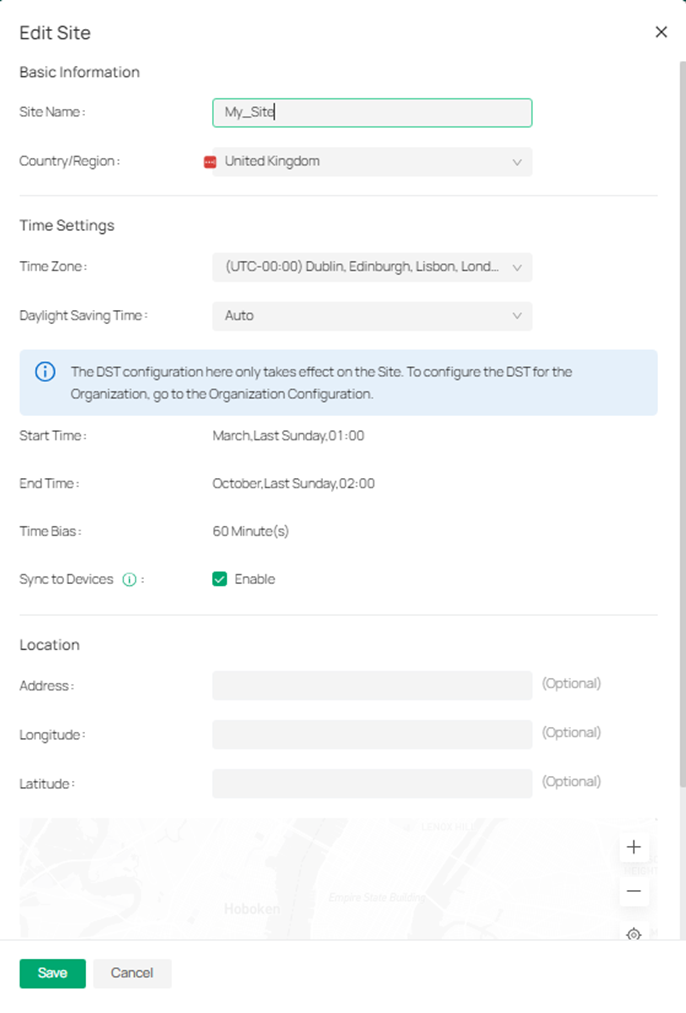
Now click on the three dots next to the Default site and select Edit
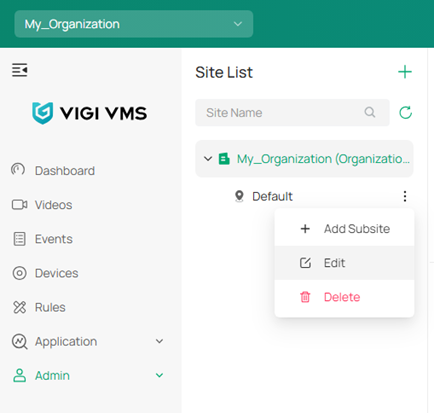
Here we can set the Site Name and set the Location, then click Save
Step 4: Adding a User
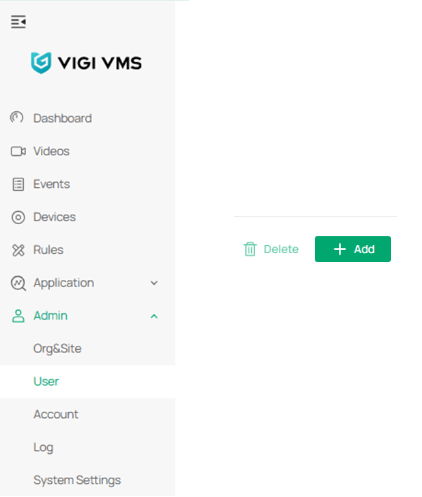
Navigate to the Admin > User Tab and select Add
Fill in the user details email address and a username then select Next

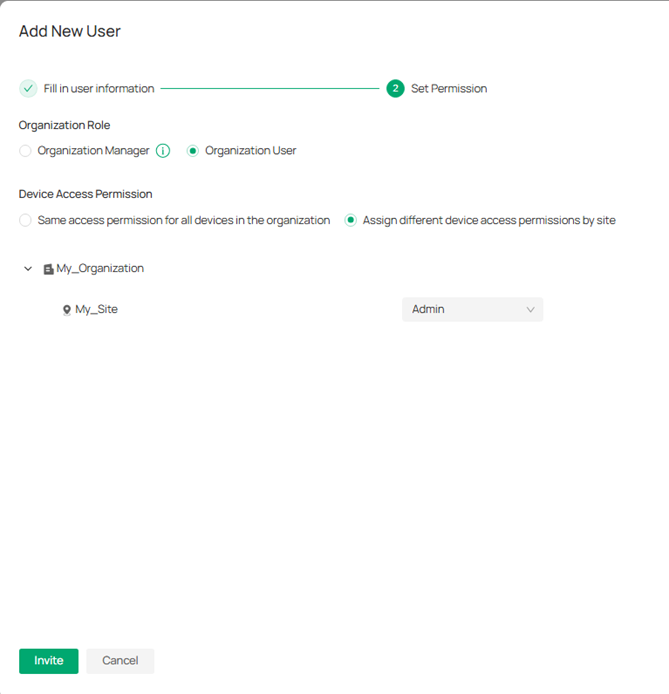
Set the Organization and Site permissions for the user, then click Invite
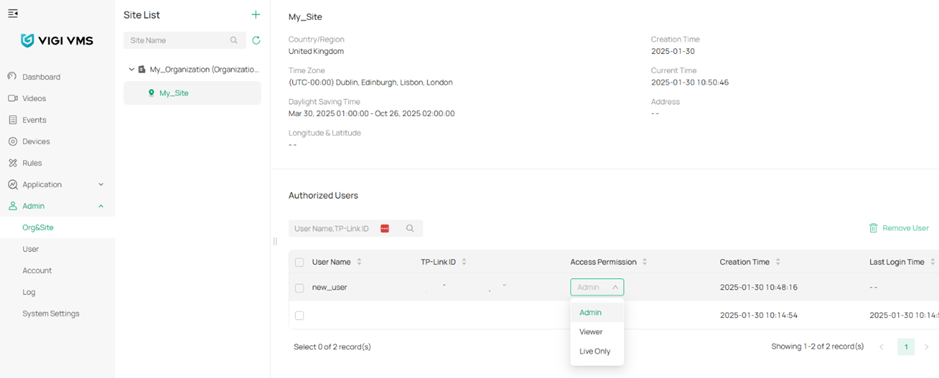
Changing the User Access Permissions
User permission can be changed by navigating to the Admin > Org&Site tab