Ruckus SmartZone Best Practice Guide
Purpose
The purpose of this guide is to take you through the wireless best practice settings on the virtual SmartZone controller.
Configuration
Step 1
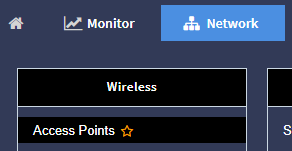
You will first need to navigate to network and then from the drop down menu select access point.
Step 2
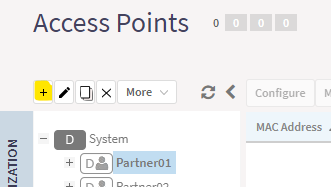
You will then be presented with the access points screen where you can create a new zone by selecting the relevant domain and then selecting the + icon.
Step 3
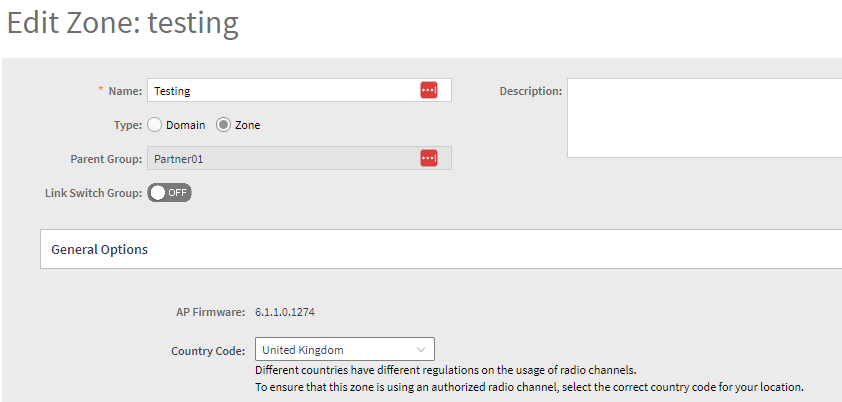
In the configuration box that will appear you will need to select zone, give your zone a name and also set the relevant country code for where the AP's will be deployed.
Step 4
A username and password is also required, it will not allow you to confirm the configuration without filling this section in. This username and password will be used to access the CLI of access points after they have connected to your zone.
Step 5
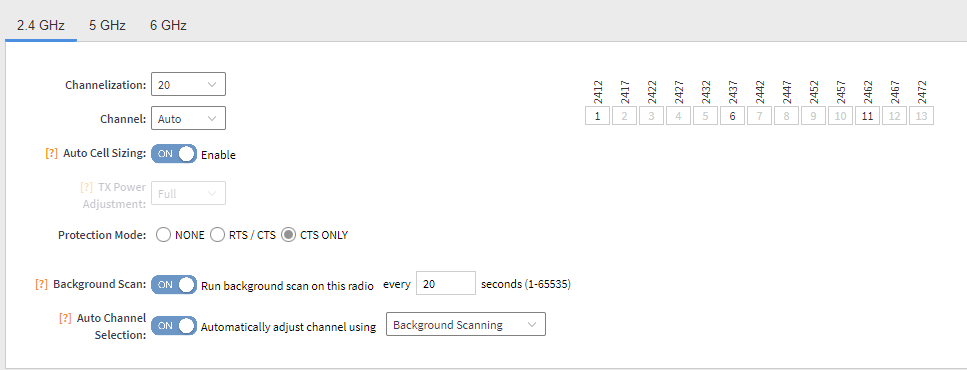
You will need to scroll down the configuration box where you can configure your AP radio settings under Band/Spectrum configuration. You will then need to configure your 2.4Ghz radio settings, set the channelization to 20Mhz as this will prevent any channels from bonding.
In the controller with the new version of firmware your channels will be set to 1, 6 and 11 which are non overlapping channels. If you are using older versions of firmware all channels will be selected which means you will need to disable all other channels.
You will also need to enable auto cell sizing as this will allow the AP's to determine their own power levels based on the environment they have been deployed in. The last option is to select CTS only which gives destination devices the ability to receive data once a transmission has been started and will help reduce traffic.
Step 6
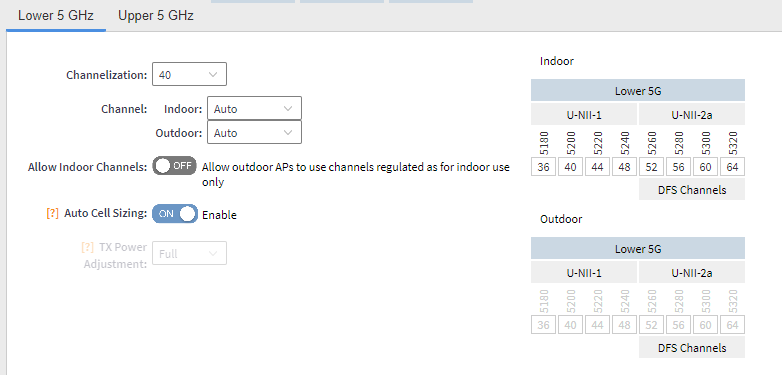
After completing step 5 you will need to select the 5ghz tab which is located to the right of the 2.4Ghz tab. Set your channelization to 40Mhz however in heavily congested areas we advise using 20Mhz channels. You will also need enable auto cell sizing as this will allow the AP's to determine their own power levels based on the environment they have been deployed in.
Step 7
The multicast options below will be enabled by default, you will need to disable these options.
Step 8
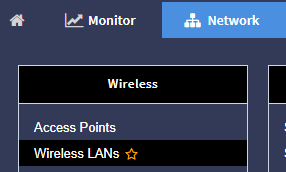
After completing your zone configuration you will need to select network from the menu located at the top of your page and then in the drop down select wireless LAN's.
Step 9
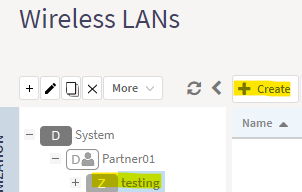
In the wireless LAN's section you will need to select your zone and then click create.
Step 10
If you are creating a guest WLAN you will need to enable wireless client isolation, this will isolate all guest clients on the wireless and prevent them from seeing each other.
Step 11
Under advanced options you will need to scroll down to enable OFDM only and then set your BSS min rate to 12mbps. This feature helps clients roam between access points by providing a minimum speed requirement that must be met for the client to connect to the AP.
Step 12
You will also need to set the directed MC/BC threshold to 0.
Step 13
You will also need to enable airtime decongestion. This setting will optimize management traffic and prevent it from taking airtime away from client connections.
