Configure an Access Point for Site Survey
Purpose
To identify the best placement of an access point it is advised that a physical site survey is conducted, this guide demonstrates how to configure a Ruckus Access Point to operate in standalone mode broadcasting the required SSID's
Pre-Requisite:
Download the latest version of standalone firmware relevant to your access point unless your access point is already running standalone firmware
Configuration
Step 1:
Login to the access point using the username super and the password sp-admin
Step 2: Change the country code
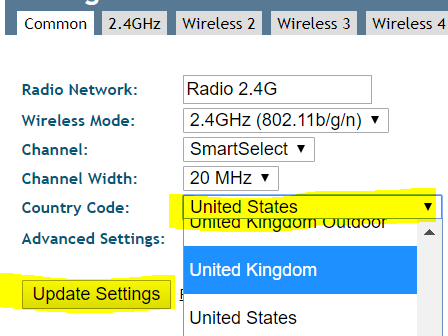
Change the "Country Code" to "United Kingdom" and select "Update Settings". This will then cause the access points to reboot.
Step 3: Change the transmit power
Change the transmit power for the 2.4GHz radio. We do this to ensure that we cater for when the access points are deployed and can see one another over the air they may reduce there transmit power to negate the effects of interference and potential channel overlap.
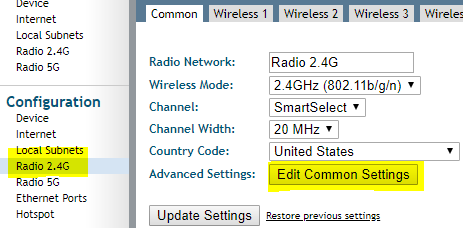
Under "Configuration" select "Radio 2.4G" and then click on "Edit Common Settings"
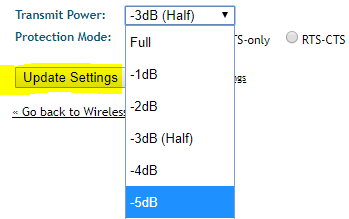
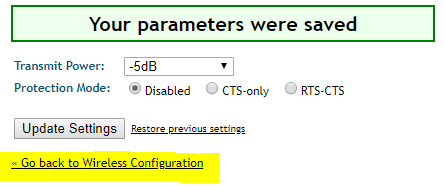
This will take you to a new page where you can lower the "Transmit Power" by 5dB, once you have selected -5dB select "Update Settings" then
Once the settings have been saved click "Go back to Wireless Configuration"
Step 4: Configure the 2.4GHz SSID
Once the access point has rebooted log back into the unit and under "Configuration" select "Radio 2.4G"
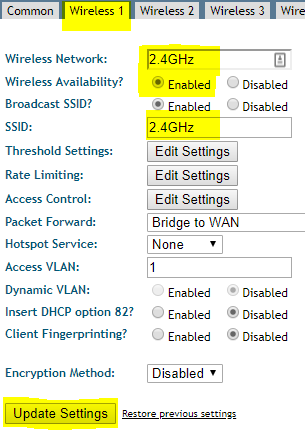
In the tabs at the top of the page select "Wireless 1" and then change the highlighted parameters, in this instance we have named the SSID 2.4GHz.
Please ensure the "Wireless Availability" option is "Enabled"
Once the SSID has been named select "Update Settings"
Step 5: Configure the 5Ghz SSID
Under "Configuration" select "Radio 5G"
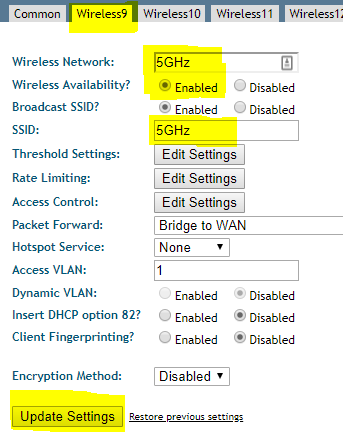
In the tabs at the top of the page select "Wireless 9" and then change the highlighted parameters, in this instance we have named the SSID 5GHz.
Please ensure the "Wireless Availability" option is "Enabled"
Once the SSID has been named select "Update Settings"

