Cambium ePMP - How to Configure ePTP Link
Purpose:
How to configure an ePTP Link
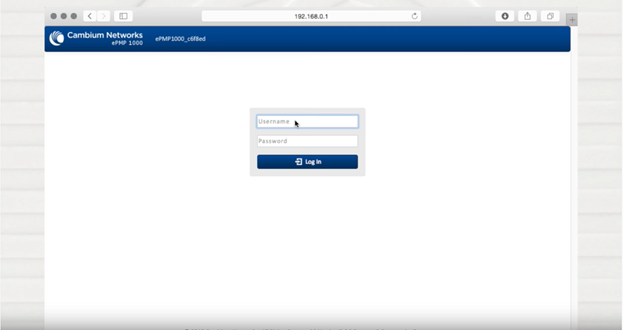
Step 1: Login to your ePMP Radio default IP <192.168.0.1> Default Username: admin / Password: admin
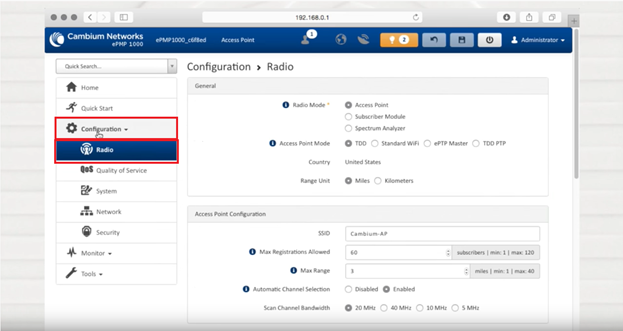
Step 2: Navigate to Configuration> Radio
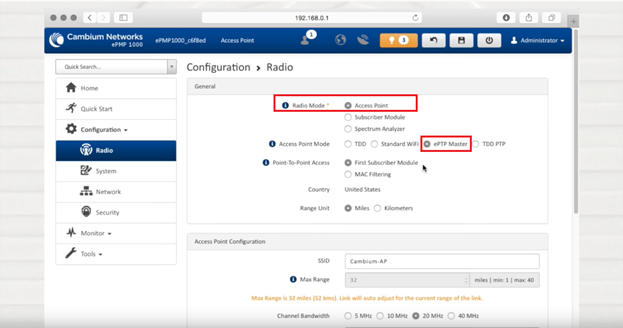
Step 3: Ensure Radio mode is set to Access Point and Access Point Mode is ePTP Master
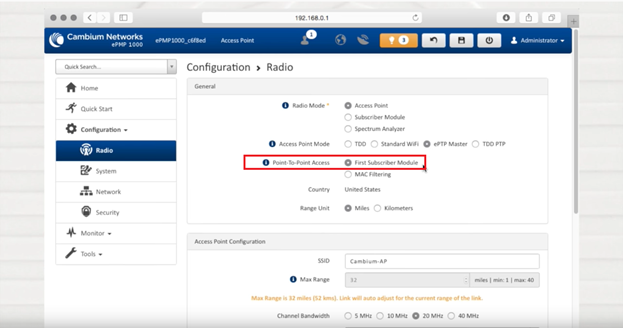
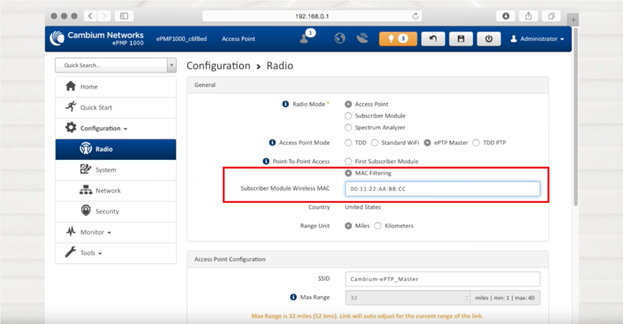
Step 4: there are two options available for a subscriber module
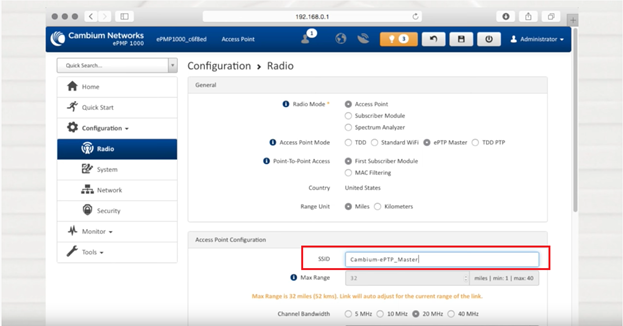
i) First Subscriber Module
In this mode, the first SM that registers with the AP will be used to form the ePTP Link
ii) MAC Filtering
In this mode you can select the MAC address of the SM that will be used on this ePTP Link
Step 5: Define your SSID, in this case we are using “Cambium-ePTP_Master”
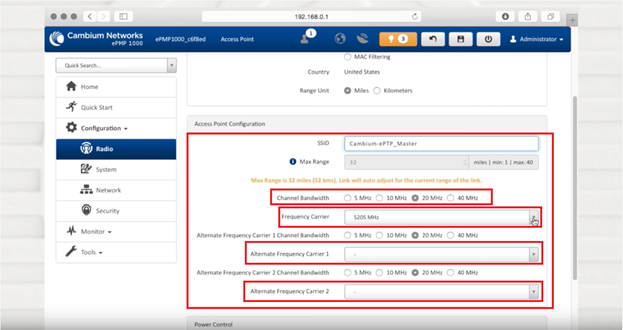
Step 6: Define your Channel bandwidth, Main Frequency Carrier and two Alternative Frequency Carriers
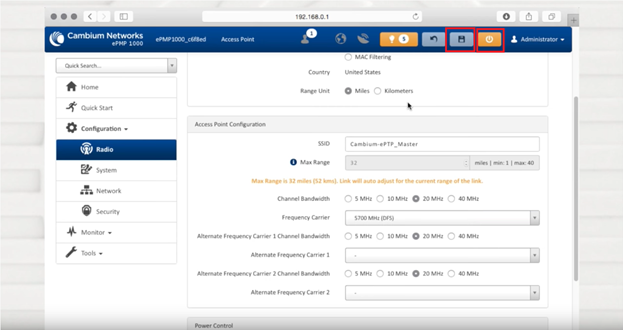
Step 7: Click to save and then Reboot
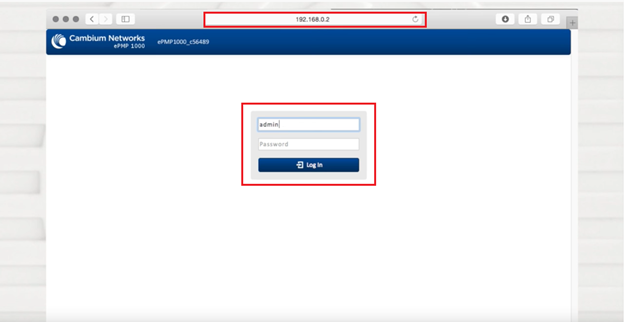
Step 8: Now connect to the SM Radio – Default IP 192.168.0.2 – Username: admin / Password: admin
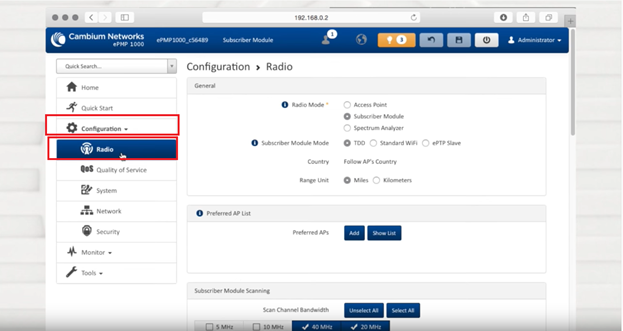
Step 9: Navigate to Configuration > Radio
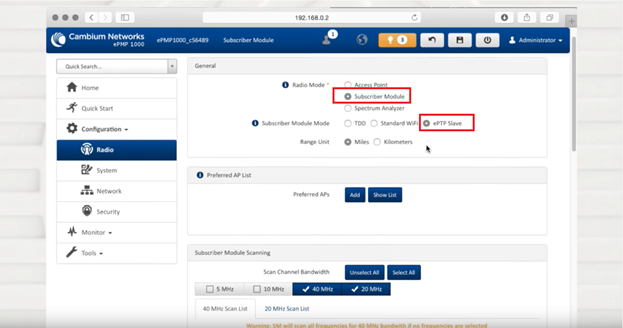
Step 10: Ensure the Radio Mode is set to Subscriber Module and Subscriber Module Mode is ePTP Slave
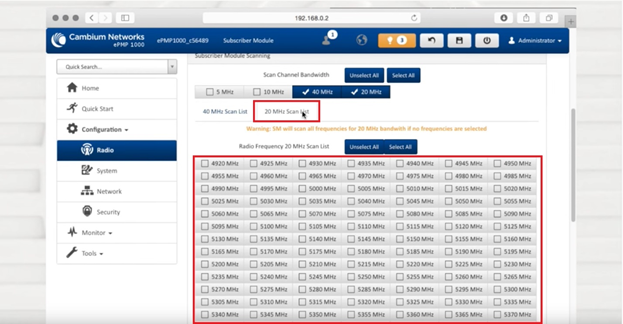
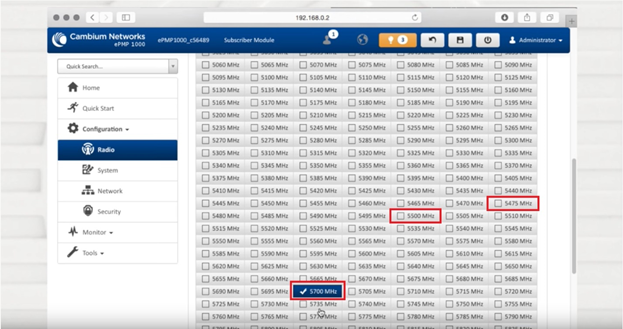
Step 11: Select the Channel bandwidth as per your choice on the AP, in this case we have selected 20Mhz, then select the Frequencies as defined on the AP i.e 5700Mhz, 5475Mhz, 5500Mhz
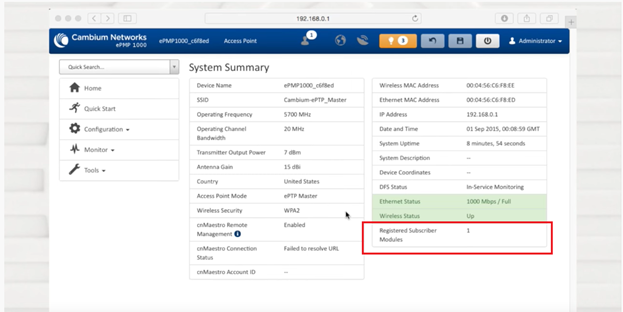
Step 12: Return to the AP and confirm the SM is now registered with the AP
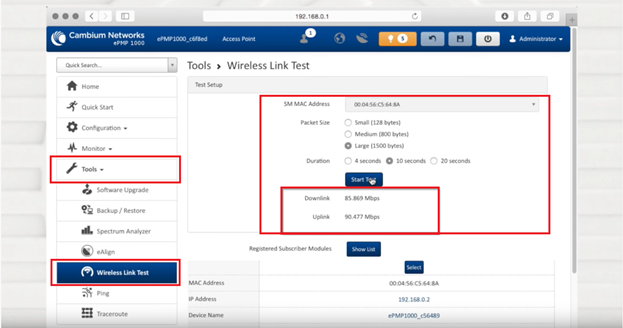
Step 13: Navigate to Tools > Wireless Link Test and run a test to confirm the link performance.

