cnMatrix - cnMaestro Switch Groups
Purpose
The purpose of this guide is to configure a Switch Group in cnMaestro and use it to deploy configuration to a cnMatrix switch.
Pre-Requisites:
The user must already have created a cnMaestro account.
The user must already have a cnMatrix switch onboarded to their cnMaestro instance.
Step 1:
In cnMaestro, navigate to Configuration > Switch Groups, and create a new switch group.
Step 2:
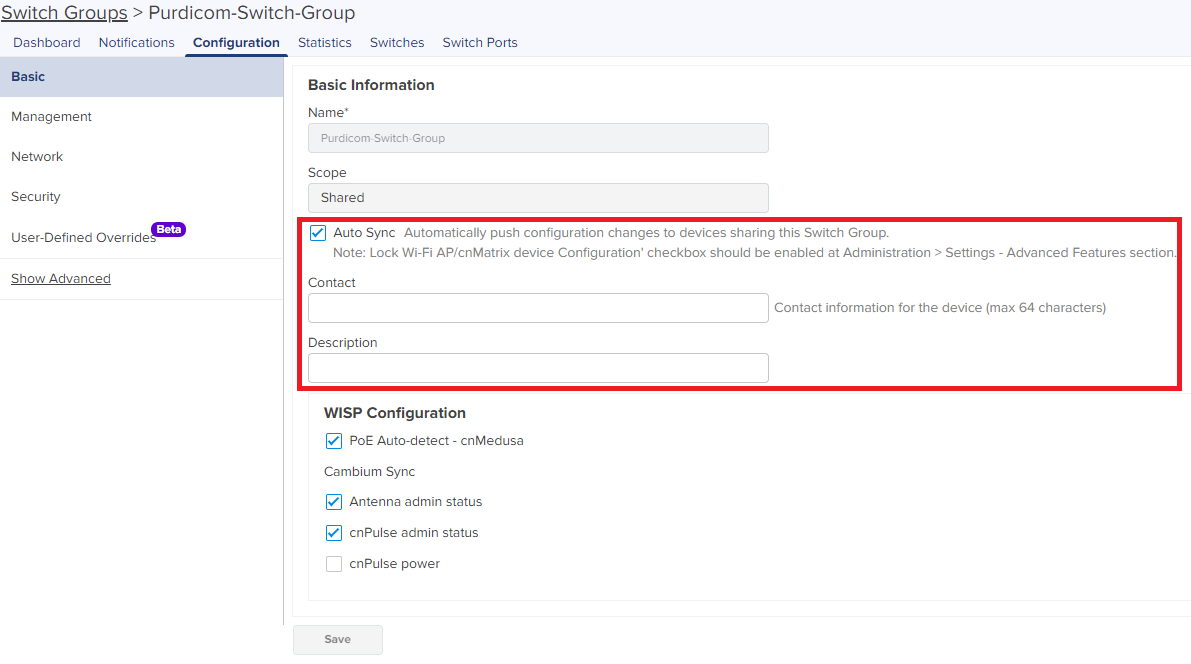
After creating the new switch group, configure the Auto Sync, system contact, and description in the Configuration > Basic menu.
Step 3:
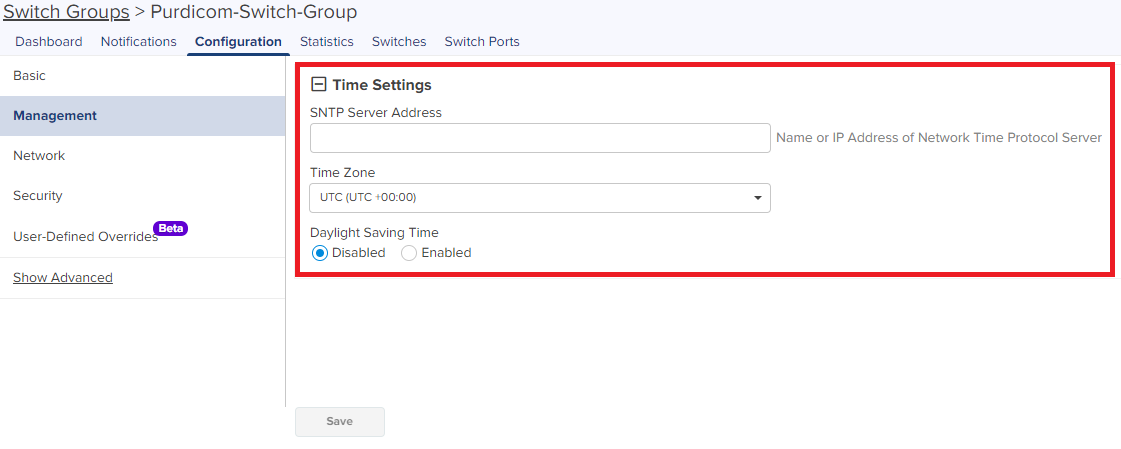
In the Configuration > Management section, define an NTP server address that will be used to provide NTP sync.
Step 4:
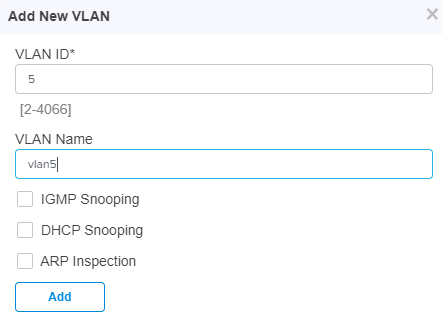
In the Configuration > Network section, configure the Default Gateway (if using static IP addressing), enable IGMP & DHCP Snooping if required, and define the VLANs for operation.
Step 5:
Save your changes to the Switch Group.
Step 6:
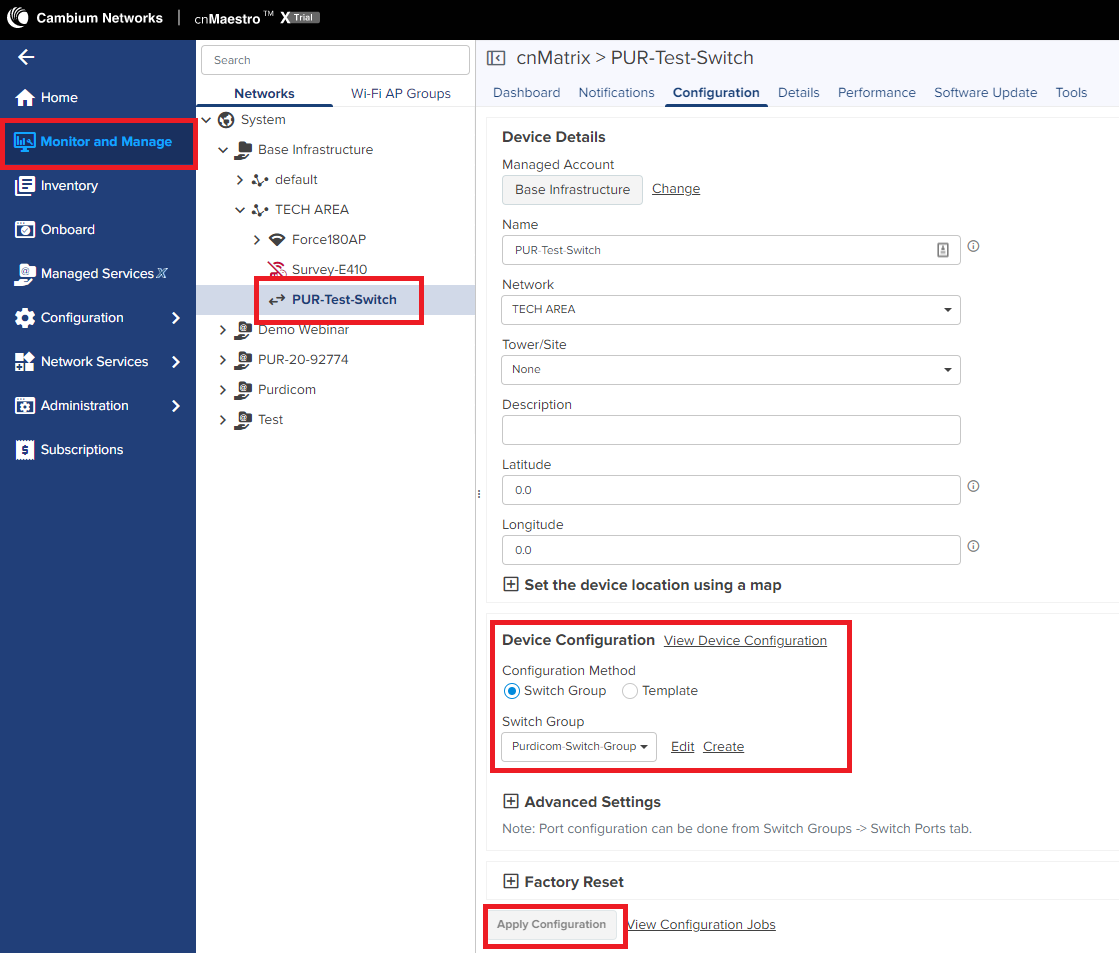
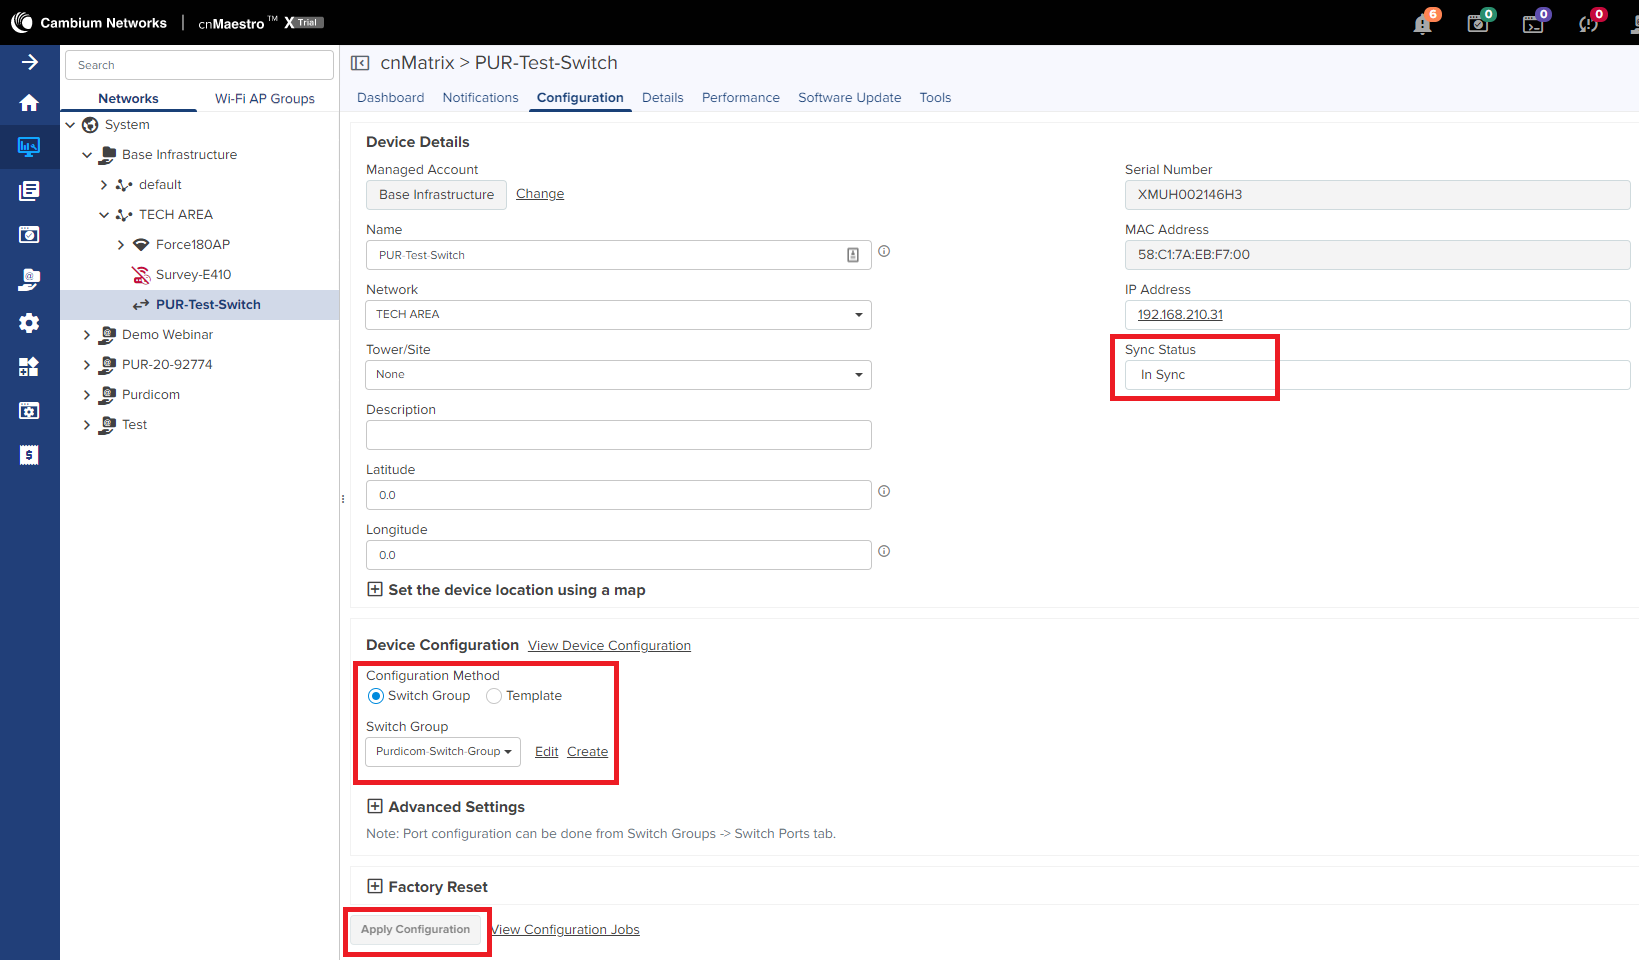
In the Monitor and Manage page of cnMaestro, select the switch in question and assign it to the newly-created switch group in the Configuration tab. Apply the change by clicking the Apply Configuration button.
Step 7:
Navigate back to Configuration > Switch Groups and select the newly-created switch group. In the Switches tab you will see the newly added switch present in the list.
Step 8:
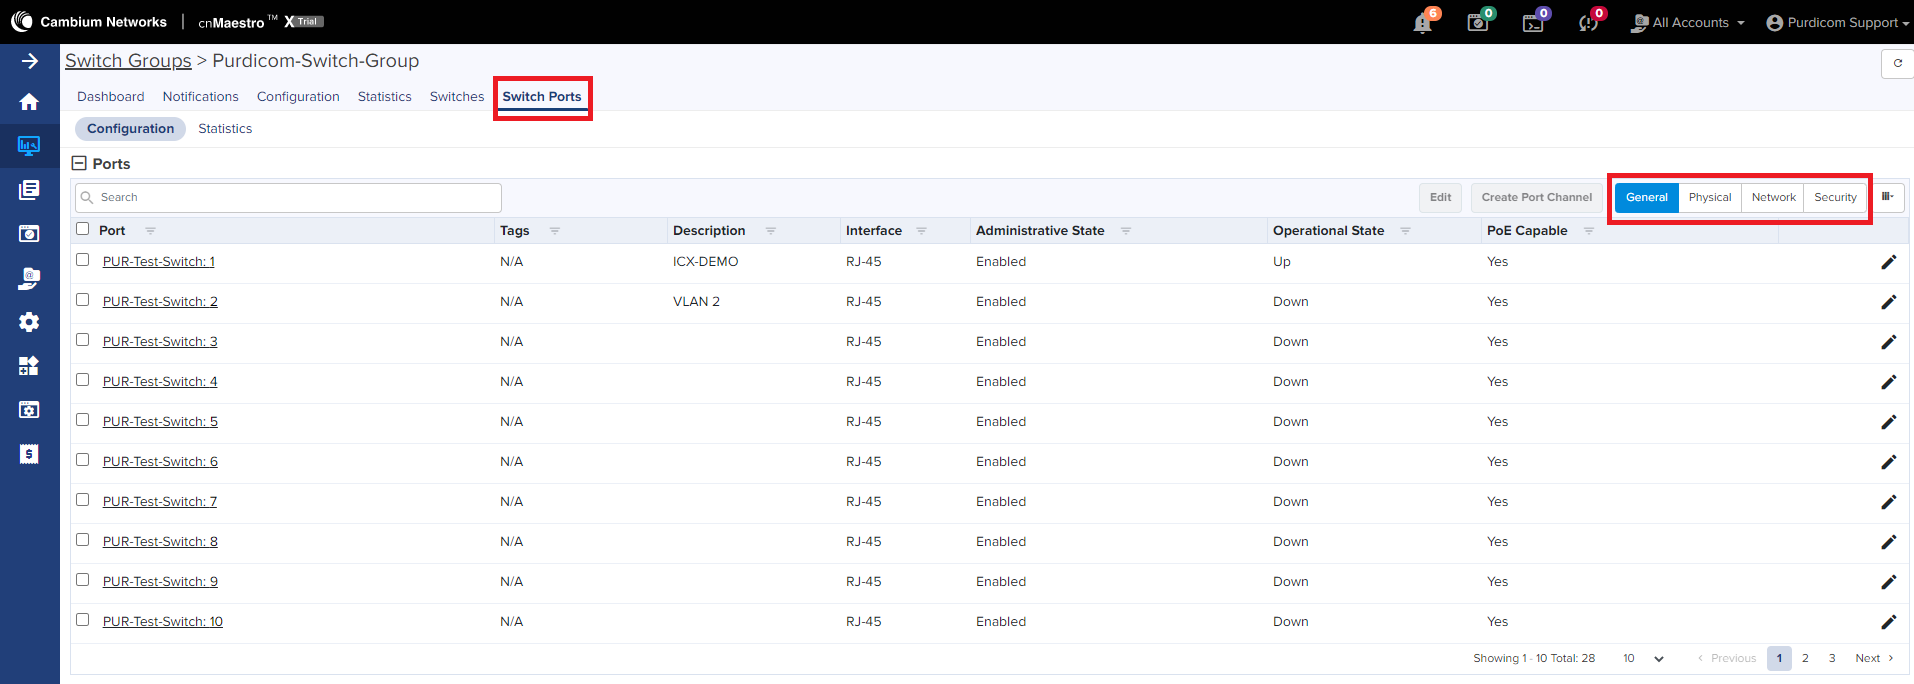
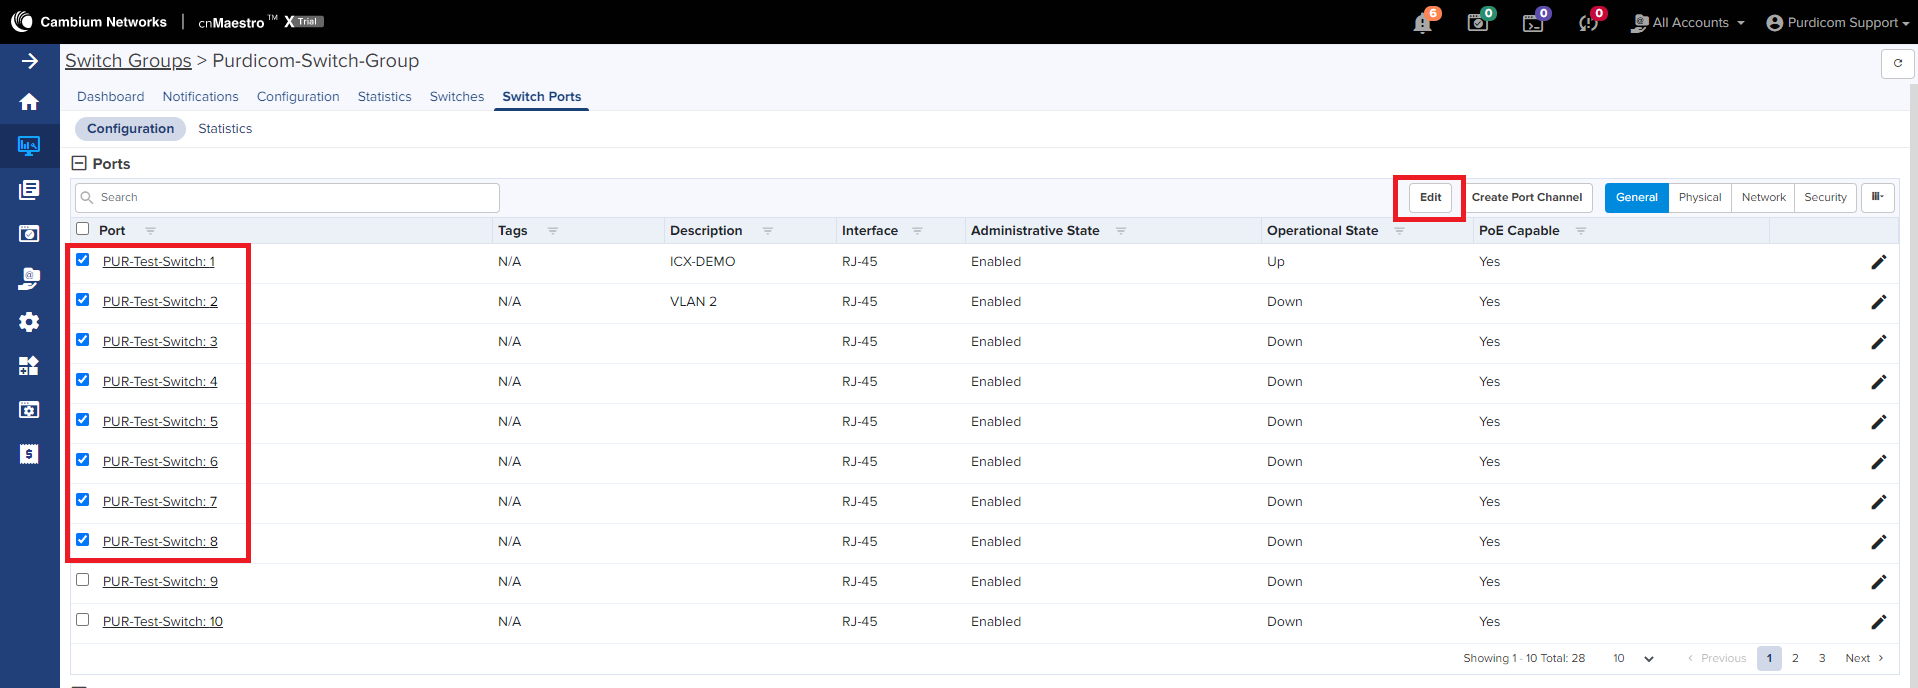
To perform port configuration, select the Switch Ports tab. This page will show a summary of each switch port, with parameters General/Physical/Network/Security selectable on the right-hand side of the page.
To perform individual port configuration, select the desired switch port from the port list. The Port Configuration page will open, with the Basic section selected. In this section, identification tags and a port description can be entered.
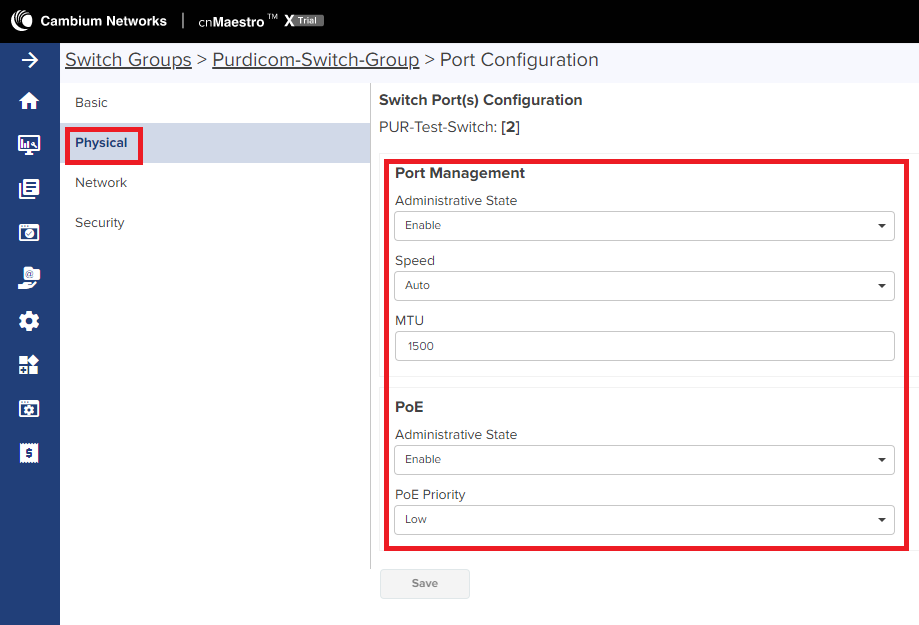
In the Physical section, PoE state and priority and Port Management parameters such as negotiation and MTU size can be modified.
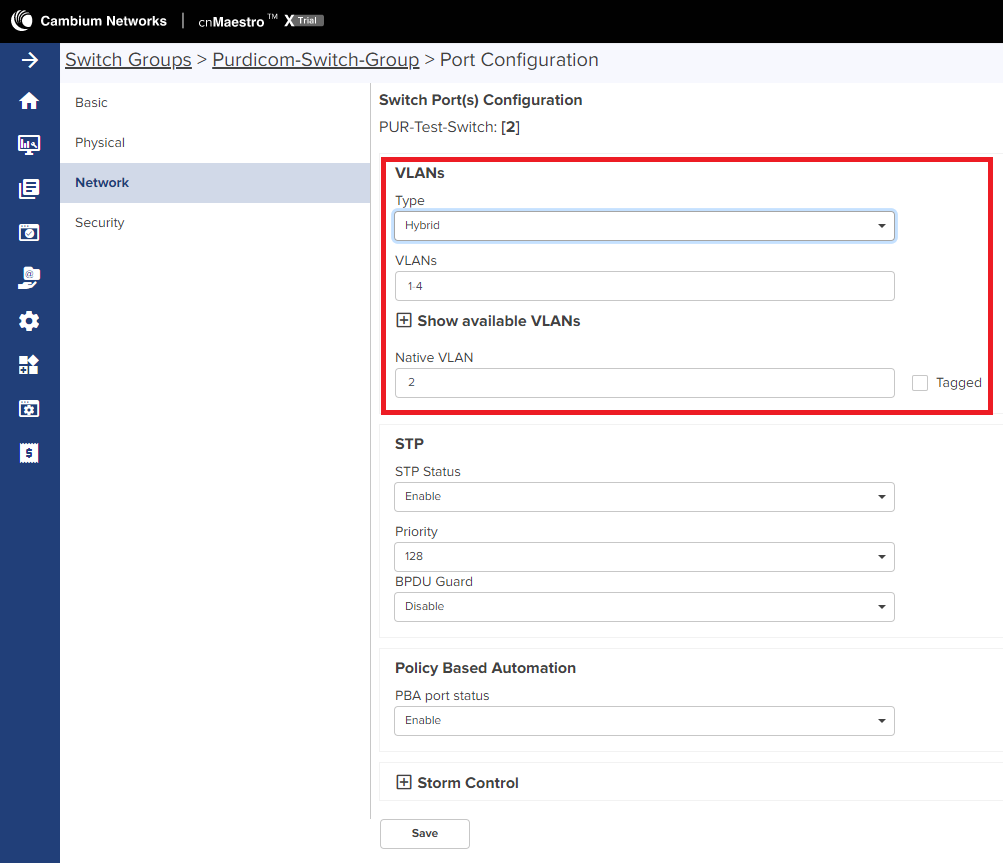
To assign VLANs to the port select the Network section. VLANs can be assigned in the following ways:
Access - a single untagged (native) VLAN is configured on the port interface
Hybrid - an untagged (native) VLAN plus up to 4094 tagged (allowed) VLANs are configured on the port interface. *This is the default port action on cnMatrix switches*
Trunk - all VLANs are tagged on the port interface.
Spanning Tree settings, Policy Based Automation, and Storm Control can also be configured in the Network section.
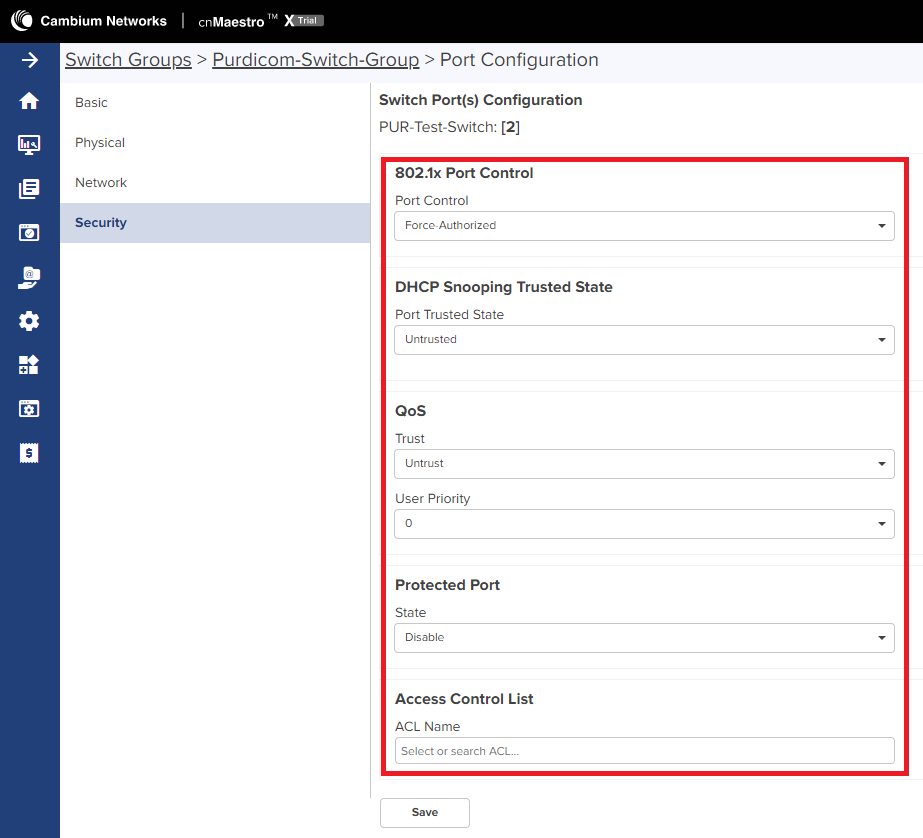
In the Security section, 802.1X port control, DHCP Snooping, QoS, Protected Port, and ACL settings can all be configured.
Step 9:
Save the Port Configuration changes to push this configuration to the switch (if Auto-sync is enabled).
To configure multiple switch ports at the same time, select the desired ports from the Switch Ports list and click the Edit button. Repeat the configuration steps defined in Step 8.
Step 10:
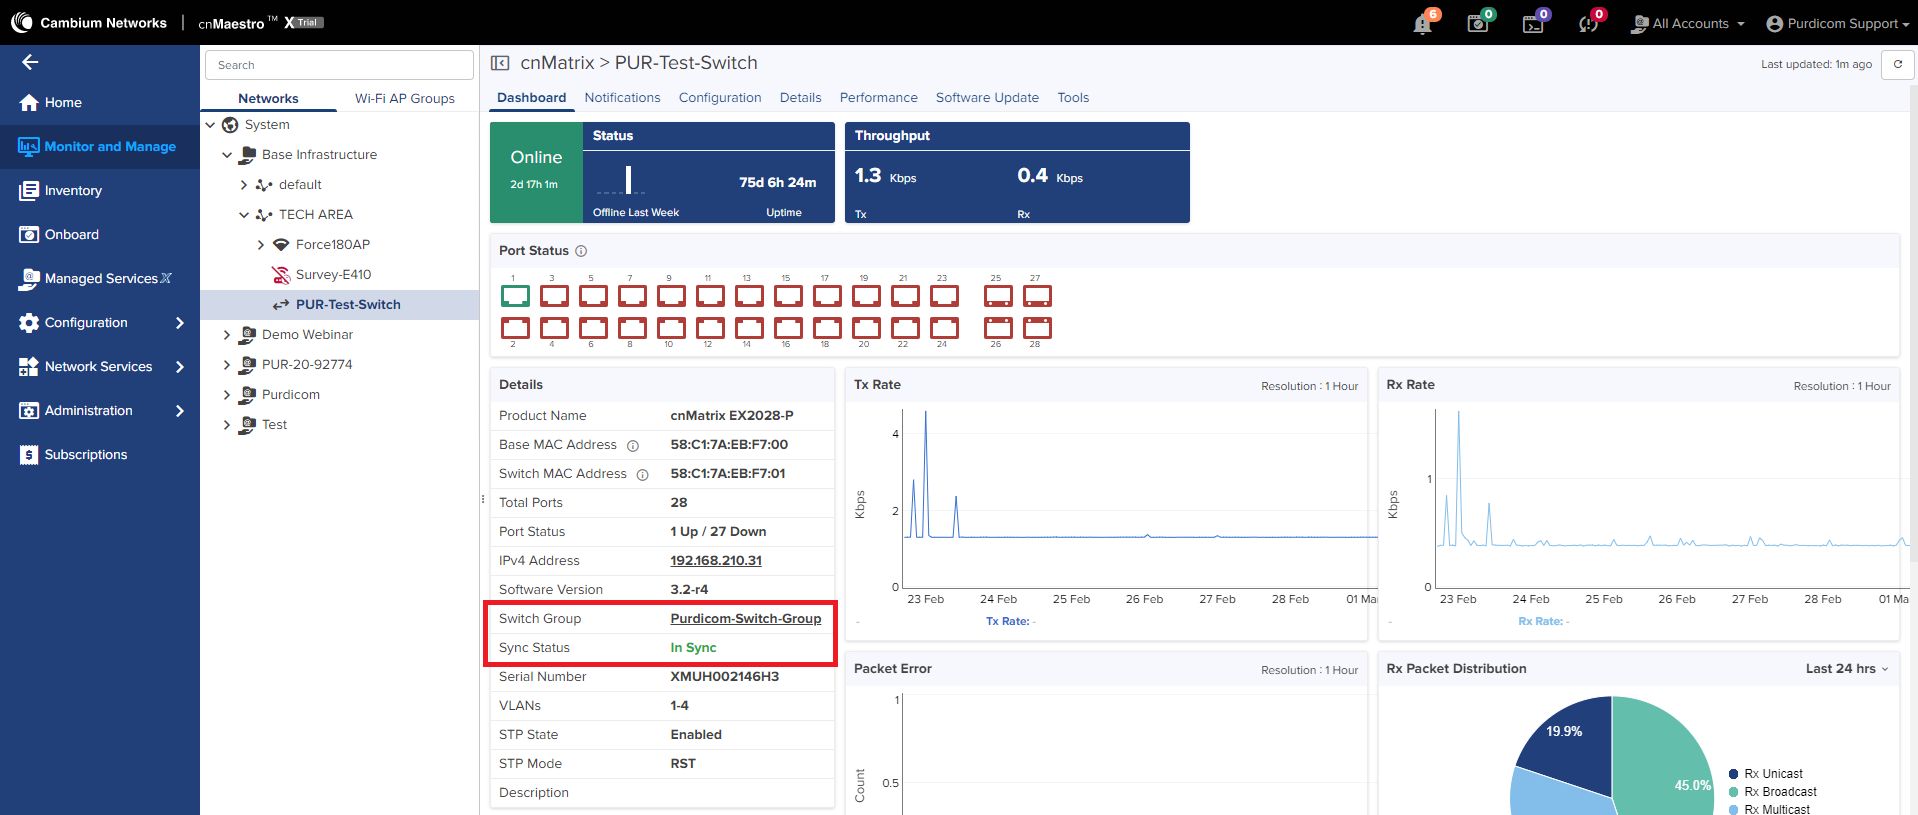
In the Monitor and Manage page, select the switch from the device tree and make sure the device status is In Sync.
If the device is not in sync due to auto-sync being disabled in the switch group, go to the Configuration tab and hit the Apply Configuration to push the switch group configuration to the switch.


