IO - Adding an AP via serial number
Introduction:
In this Guide I will be taking you through the process of adding an access point to the cloud controller by using the device serial number.
Process:
Step one:
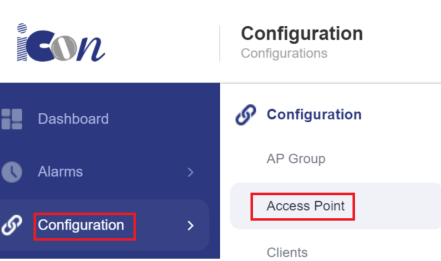
You will need to connect your AP to a live network with DHCP enabled so it can gain an IP address. Once verified, you will need to navigate to configuration and then select access point.
Step Two:
In this section you will need to select the add button on the far right of the web page:
Step Three:
You will need to copy the serial number of the access point and select and AP group for it to be associated to. You can either select a group or add a group from this page, please refer to the creating an AP group guide for more information, when you are happy click save to add the AP.
Step Four:
As you can see from the screenshot below the AP has been added.
Verify AP Connectivity:
After a couple of minutes the AP will be online and gain its configuration.
Conclusion:
In this guide we have gone through the steps of adding an AP and verified connectivity to the cloud controller.


