Cambium cnPilot - Zero Touch Meshing in cnMaestro
Purpose
The purpose of this guide is to template the configuration of mesh in cnMaestro.
Pre-Requisites:
The user must already have created a cnMaestro account.
cnMaestro :- Zero Touch cnPilot Mesh
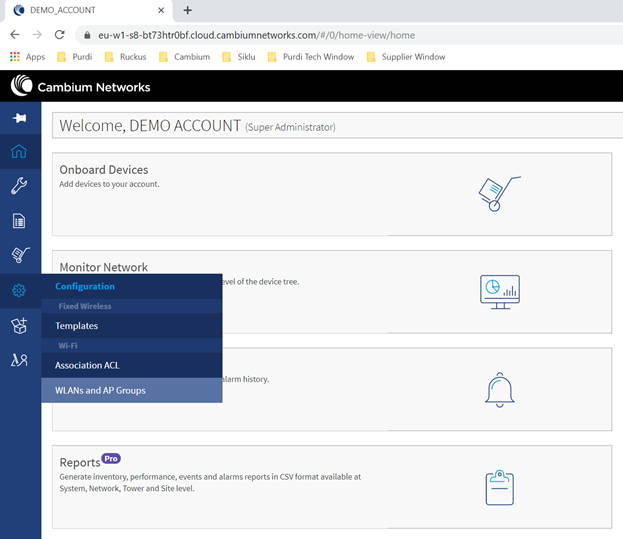
Navigate to Configuration>WLANs and AP Groups
2. Select New WLAN
You will need to create 3 WLANs – two for Mesh (Base & Client) and one for WiFi Access.
Note: the SSID, Security and passphrase must be the same for both the Mesh Client & Base
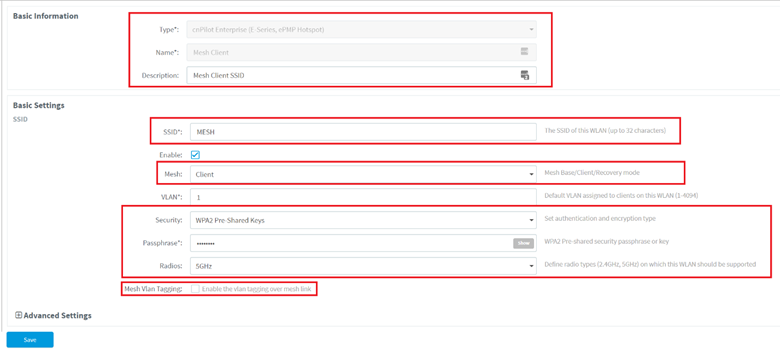
a. Mesh Client –
i. Basic Information
Type – cnPilot Enterprise
Name – Descriptive Name for the WLAN “Mesh Client”
Description – Description of this particular WLAN
ii. Basic Settings
Fill in the details for the SSID, Mesh Type in this case “Client”, select the security authentication type and passphrase, then select 5 GHz Radio.
Ensure the Mesh Vlan tagging is unchecked for Mesh Client.
Click Save
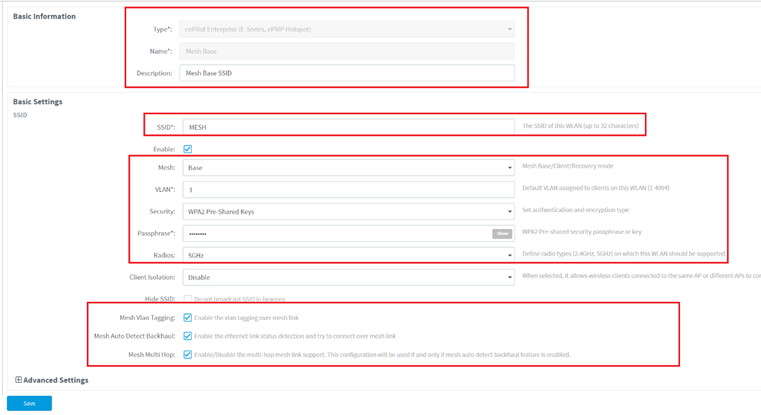
b. Mesh Base –
i. Basic Information
Type – cnPilot Enterprise
Name – Descriptive Name for the WLAN “Mesh Base”
Description – Description of this particular WLAN
ii. Basic Settings
Fill in the details for the SSID, Mesh Type in this case “Base”, select the security authentication type and passphrase, then select 5 GHz Radio. Optionally you can check the Hide SSID box.
Check the boxes for Mesh Vlan Tagging, Mesh Auto Detect Backhaul & Mesh MultiHop
Click Save
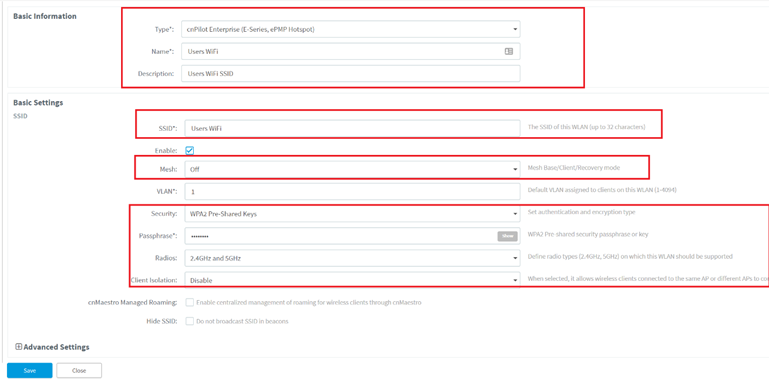
c. WiFi Network for Users –
i. Basic Information
Type – cnPilot Enterprise
Name – Descriptive Name for the WLAN
Description – Description of this particular WLAN
ii. Basic Settings
Fill in the details for the SSID, Mesh “off”, select the security authentication type and passphrase, select 2.4 & 5 GHz Radio. Optionally select Client Isolation Type depending on your network preference.
Click Save
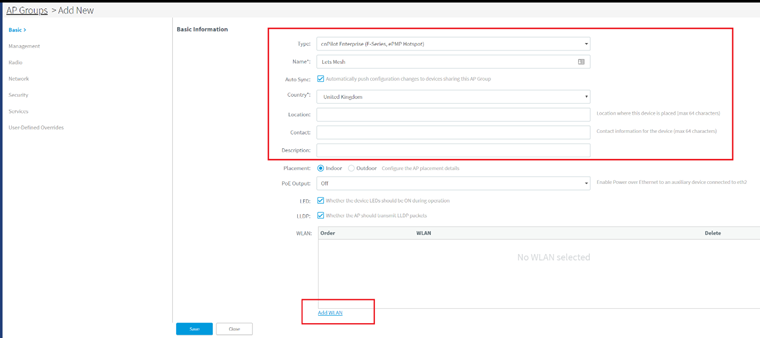
4. Select New AP Group
Select the Type – cnPilot Enterprise
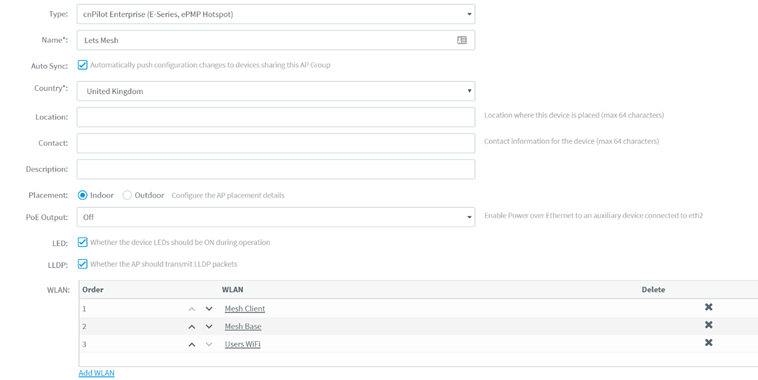
Name – In our case “Lets Mesh”
Auto Sync – Automatically pushing configuration changes to devices in the AP Group
Country – Country in which you will be deploying
Location, Contact & Description are informational and for personal reference.
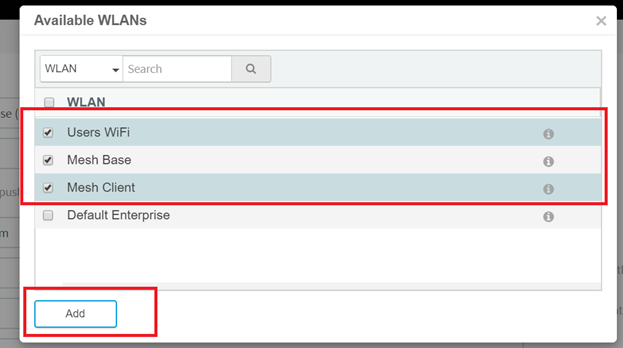
Add WLAN
Select the 3 WLANs you have recently created.
Ensure that the order of the WLANs are as follows:- Mesh Client b. Mesh Base c. Users WiFi
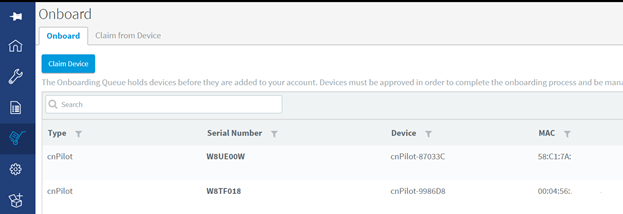
Navigate to Onboard Devices & Claim your devices using their serial numbers
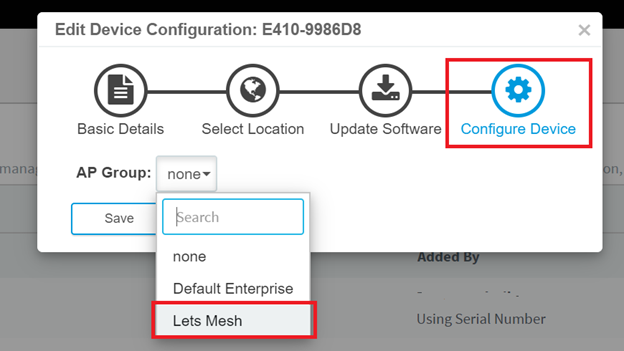
Select the “Pencil” Icon of a device
7. Navigate to the Configure Device Tab, In the AP Group Drop down box, select your recently created AP Group.
Repeat these steps for all your Mesh devices, you will see the icons Set Location and Configure Device will be green.
Power up your devices and ensure they have a connection to the Internet. Click the Approve button for each device
10. Once the devices have connected to the Internet and received the configurations the LED on the cnPilot APs should turn Blue.
11. You can then confirm the cnPilot Aps are online. Navigate to Inventory > WiFi AP Groups
12. Now deploy your APs, Ensure that at least one AP will have an Ethernet (Internet) connection as this will determine which AP will be the Mesh Base. The remaining APs will become Mesh Clients. Check the Mesh Connectivity Manage > WiFi AP Groups > Mesh Base AP > Mesh Peers
