cnMaestro - Onboarding APs with Pre-Configuration
Purpose:
This guide is to demonstrate how to onboard and AP with Pre-Configuration.
Pre-requisites:
- Have a cnMaestro account set up (Essentials or X)
- Create Network and Site
- Create an AP Group
- Create a WLAN
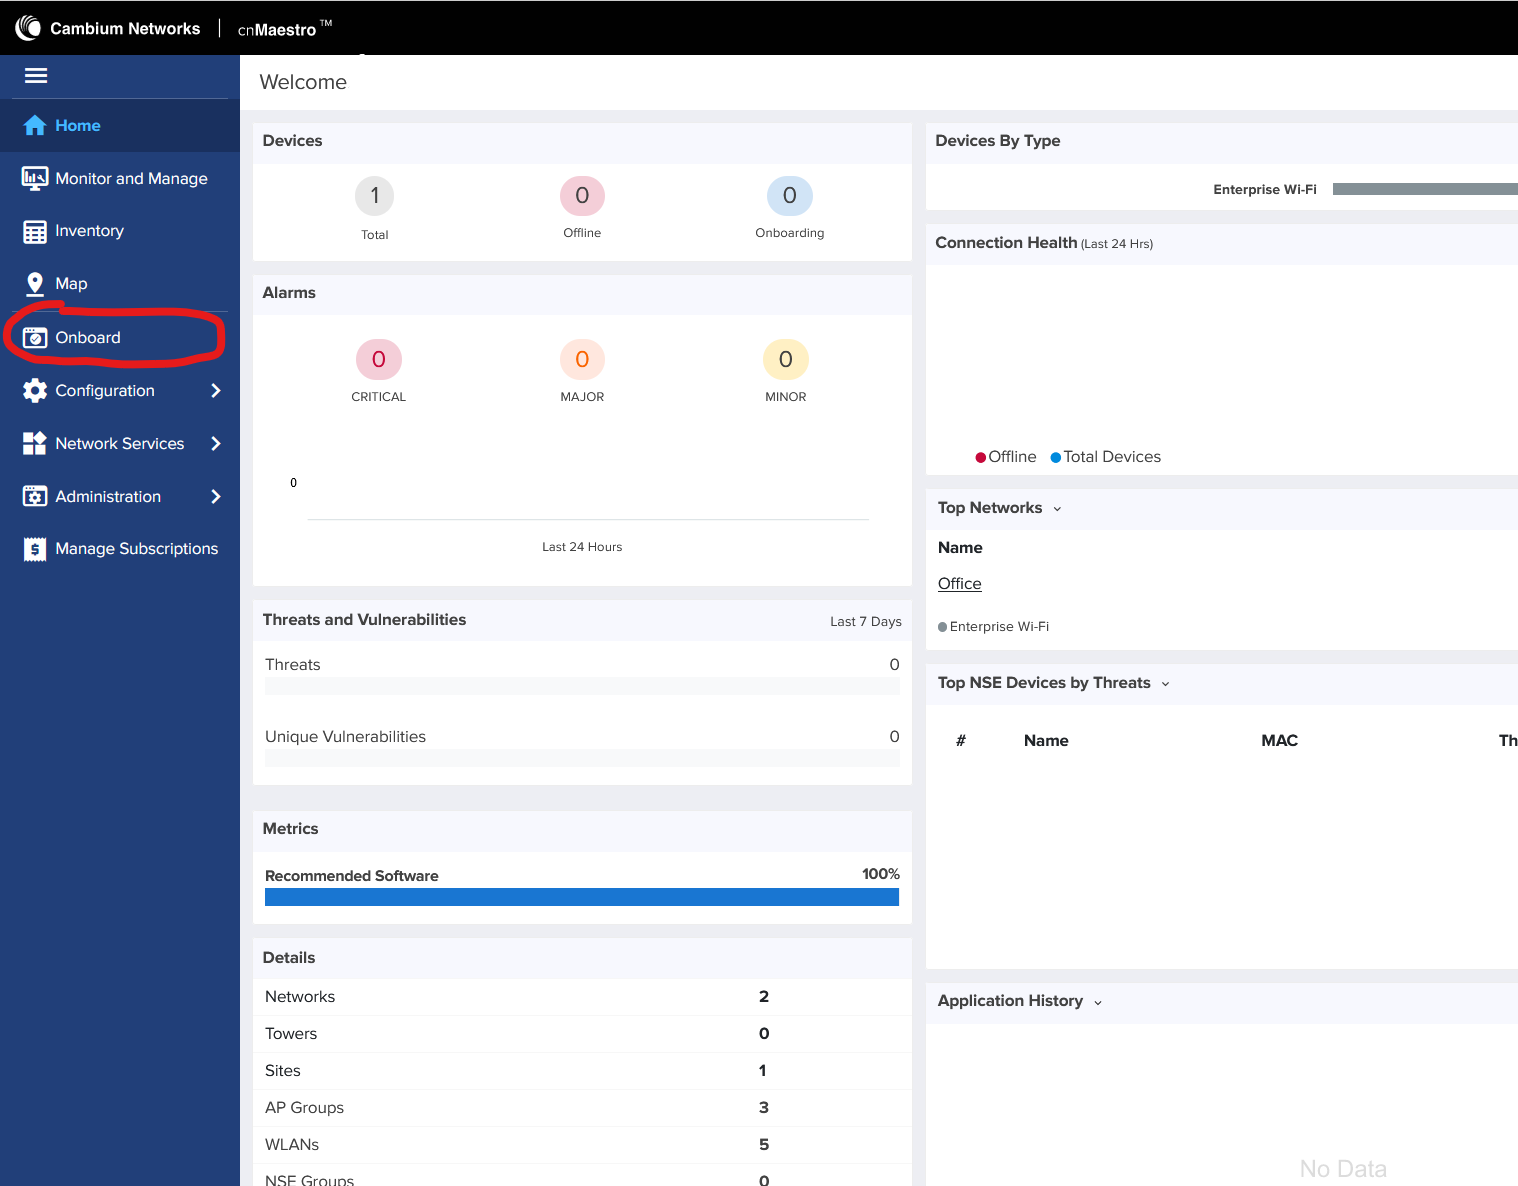
Step 1: On the left hand side of the home page click the onboarding Icon to go to the onboard page.
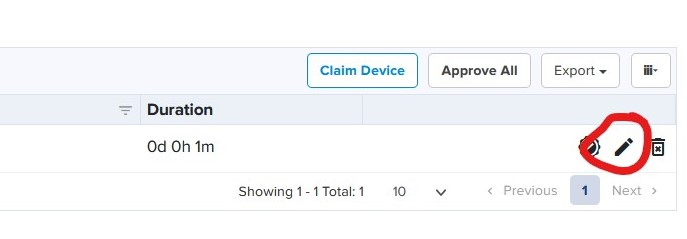
Step 2: At the top of the table click on Claim Device
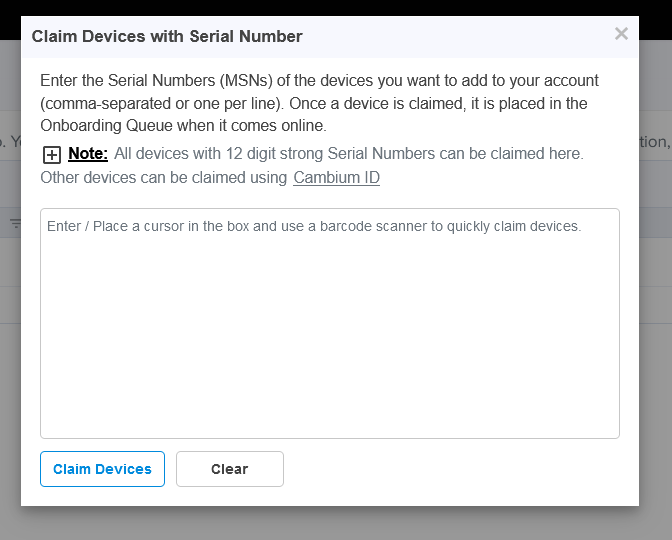
Step 3: Enter the Serial number(s) of your AP(s). and click on Claim Devices. This will add the Serial numbers of the APs to your cnMaestro onboarding queue. Once the AP(s) are plugged in and go out to the internet they will appear as online on the onboarding screen.
Step 4: Once you have claimed your device it will appear on the devices list on the onboarding page. Click on the edit pencil on the far right of the page.
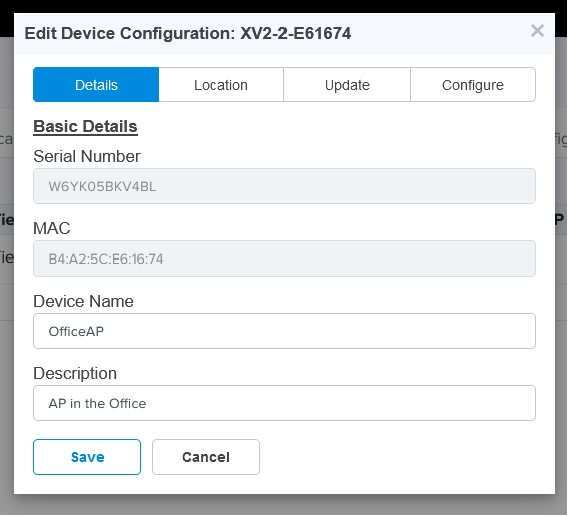
Step 5: This will open the edit Device Configuration box. On the first Tab, 'Details', give the AP a name and a description if desired.
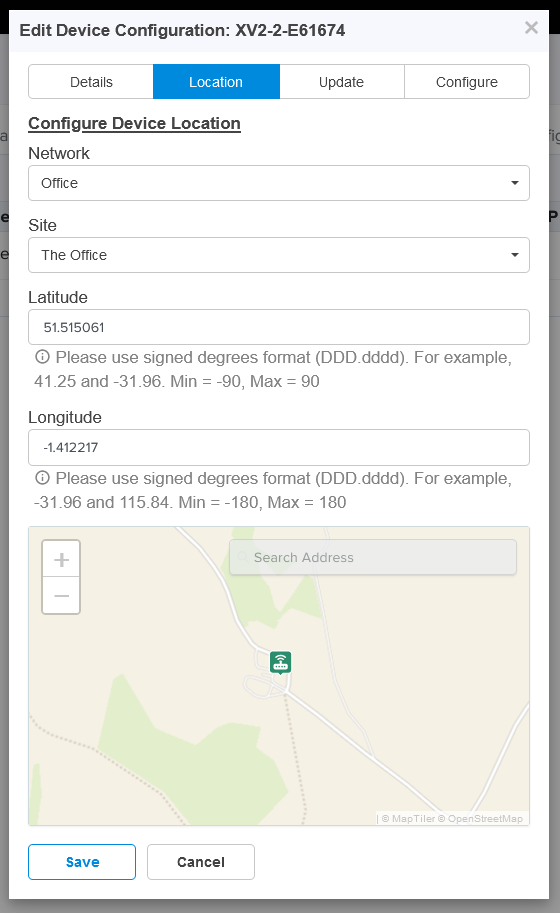
Step 6: Next go to the 'Location' tab. Here, from the first drop down box you will need to select which network you want the AP to be assigned to. The next drop down box you will need to select the site the AP is going to be installed at. Once the site is selected the Latitude and Longitude boxes will populate.
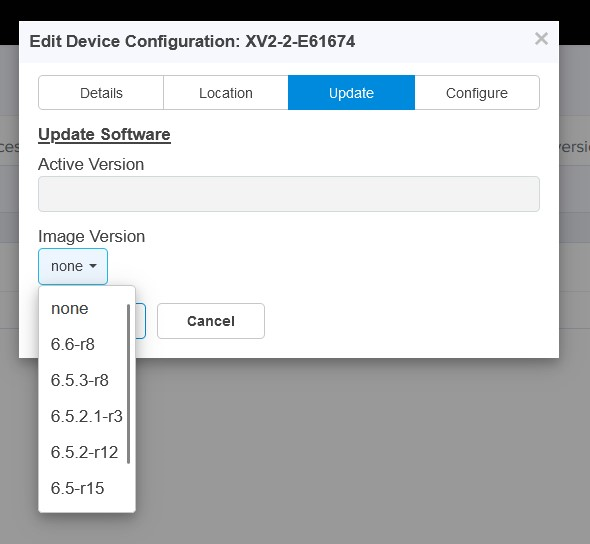
Step 7: Next go to the update tab. Here you can set which software image is applied to the AP. Once the AP is approved and comes online this software image will be pushed out to the AP. Best practice is to select the software version which is marked as 'Recommended' by Cambium.
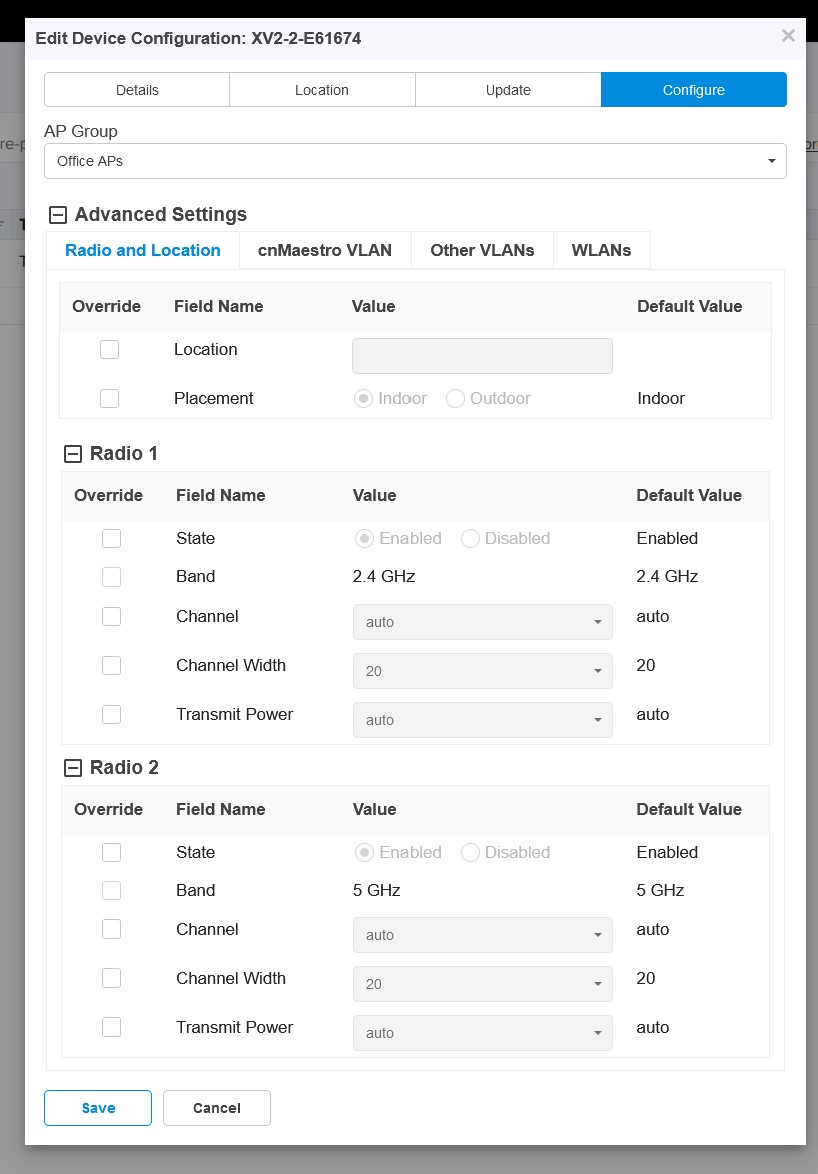
Step 8: Next go to the Configure tab. From the drop down box select the AP Group you want the AP to go against. The AP Group is what gives the AP its configuration and SSIDs. Once you have selected the AP group the the advanced settings section will appear.
This section gives you the option to override settings on a particular AP that are applied from the AP group. For this example we are going to leave all the advanced settings as default. So the AP will be configured with what has bee set in the AP Group.
Once you have set the AP Group click the Save Button.
Step 9: After you have saved the configuration you will be taken back to the Onboard devices list. The edit pencil on the left hand side will show as a green colour to show you have gone through the pre-configure settings.
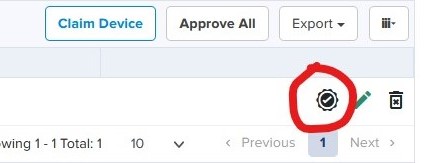
Once you are happy everything is set click on the Approve Device button on the right hand side next to the edit button.
After the device is approved and comes online the software image will be updated and the AP group configuration will be pushed to it. When this has finished the AP will then show as onboarded and will be up and running.
