Nomadix - Access Codes
Creating Access Codes:
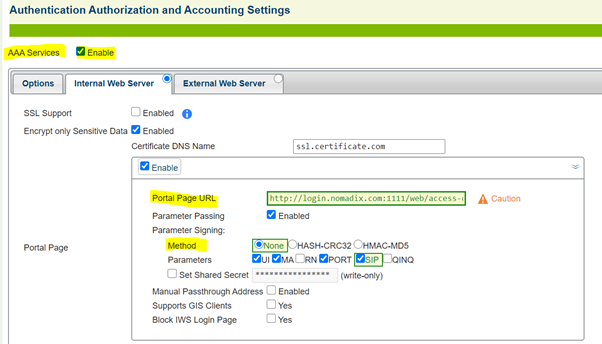
Step 1- The first step will be to configure the portal page in Configuration-->AAA. You will need to enable AAA and the portal page section, once enabled you will need to add the portal page URL for access codes (http://login.nomadix.com:1111/web/access-code-login.htm) and set the method to none.
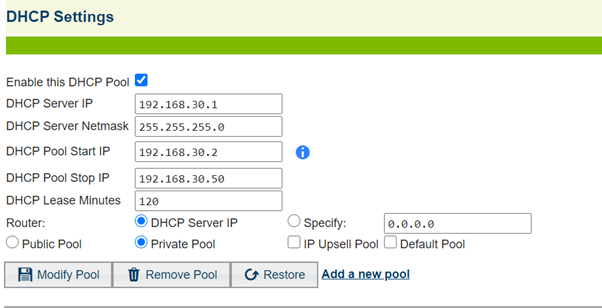
Step 2- You then need to create a DHCP pool which will give connecting clients an IP address from the pool you create, to know more about this there is another DHCP document taking you through the configuration steps.
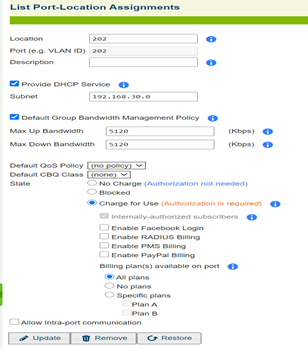
Step 3- If the client needs to be in a specific VLAN you can create a port location on the Nomadix under Port-Location-->Add. If you also want clients within this VLAN to receive a specific IP address from a pool you have created you can put the IP subnet under this section. You will also need to ensure the VLAN's you have configured on the Nomadix are tagged on the switch.
Step 4- You will need to create an access code plan which is under Subscriber Administration-->Access codes. In this section you can select the maximum devices that will use this plan, the access code people will use when logging on, how long the session will last, when they need to activate the code by and you can add a bandwidth class which can be created under configuration-->Class-Based-Queuing. You can also include a specific subnet if you need users connecting via access code to have a specific IP address.
Step 5- You can then select add and the plan will be added to the list, you can then go back into the plan by selecting the pencil icon once selecting the plan. If you select create & print it will bring up the below screenshot that someone can use when they try and connect to the internet.
Step 6- You will also need to create an SSID under your Smartzone but first in the WLAN section you will need to create a zone in which you can create WLAN’s for connectivity.
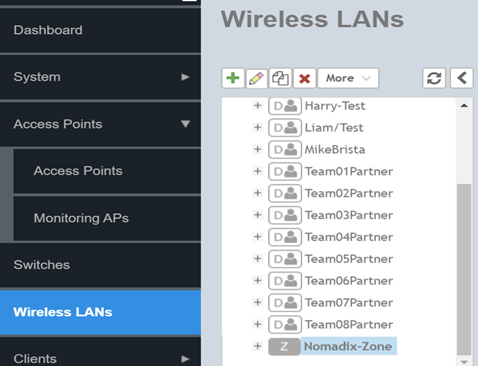
Step 7- When you have completed the process of setting up the zone for Nomadix you will see it appear in the side bar under WLAN’s.
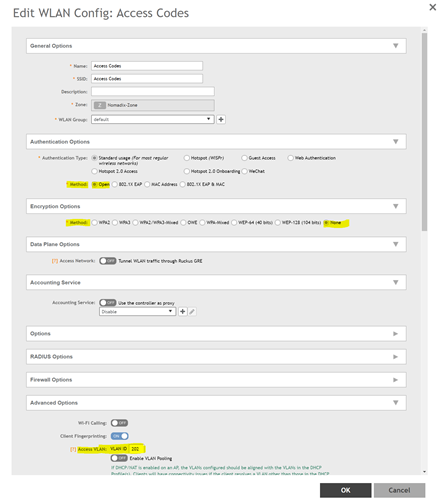
Step 8- You then need to create an SSID under the zone, just select on the zone and select the pencil icon that says configure. When creating the SSID you will need the authentication method to be set as open and the encryption method set to none. If you are using a port Vlan ID you should also set the access Vlan to the one you have configured on the switch and Nomadix. When this has been completed just select ok to finish the process.
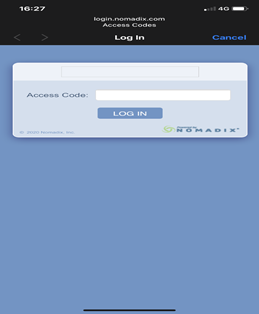
Step 9- When you have finished creating the SSID you will need to verify that it works. Using a phone/laptop try and connect to the SSID and you will see the below screen appear in which you will need to type in the access code.
Step 10- As you can see below after entering the access code in the client is connected and has been given an IP address in the subnet assigned to Vlan 202.
