Nomadix - Enabling DHCP and VLAN tagging
Enabling DHCP and VLAN Tagging
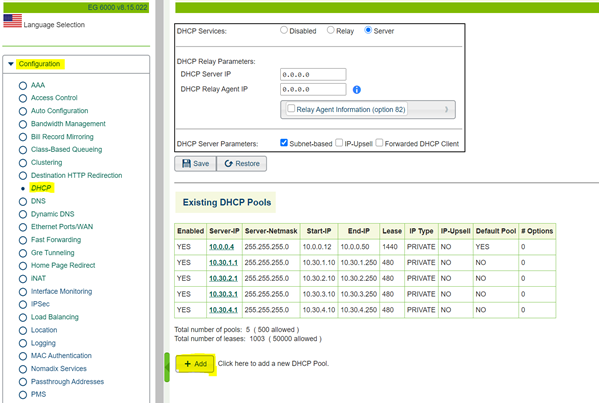
Step 1- To create a DHCP pool you will need to go into Configuration-->DHCP and from there you can start the process by selecting add which sits under the DHCP pool table.
You must also select "Subnet-Based" under the DHCP Services table.
Step 2- Once you have selected add you will be presented with the following page as shown below. You will need to ensure that DHCP is enabled and that the sections highlighted in yellow are filled out with relevant information. When this has been completed you will need to select add pool to finish the process.
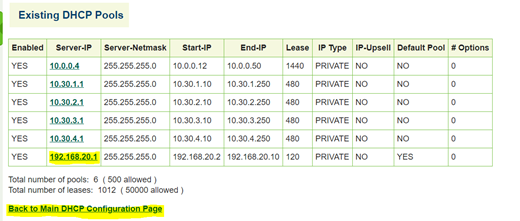
Step 3- When you have completed the above process you will see that the DHCP pool you have created will appear in the existing DHCP pools table. To get back to the main DHCP page you can select back to the main DHCP configuration page.
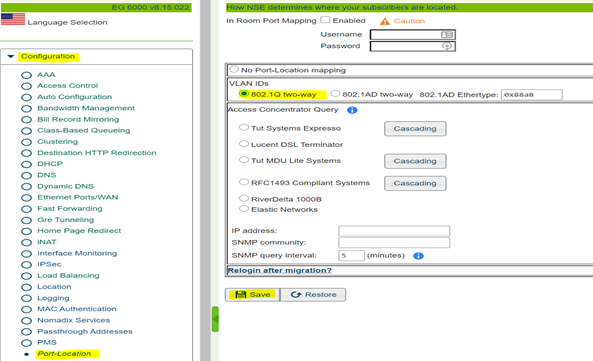
Step 4- When you have finished setting up the DHCP pool you will need to enable VLAN tagging on the Nomadix gateway. To do this you will need to go into Configuration-->Port-Location where you can enable 802.1Q two-way.
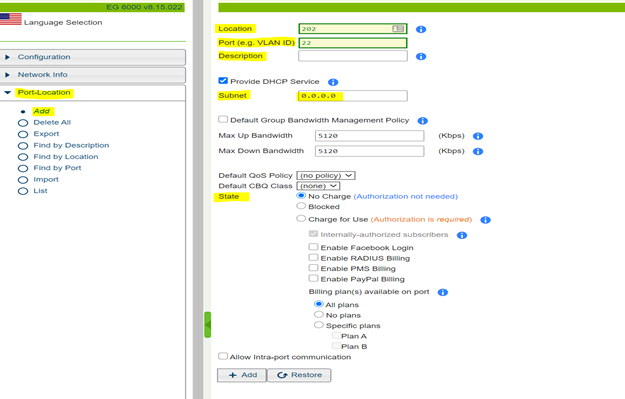
Step 5- Once 802.1Q has been enabled you will need to go into Port-Location-->Add. As an example, your location could be a room number that you need associating to a VLAN ID. The port section is the VLAN ID you want to be associated with the location and you can choose to add a description if needed. In the subnet section, you can add the subnet address of a DHCP pool you have created if you want clients within that VLAN to have a specific IP. You can also choose whether to charge users or not, once finished filling out the relevant information just select add.
Step 6- When you have finished filling out the relevant information you can find the VLAN under Port-location-->List and verify the details are correct. To edit the VLAN information you can just click on the VLAN you want to edit and it will bring up the setup screen from the previous step.
