Public IP addressing with third party device
Introduction:
In this guide, we will be taking you through the steps for setting up clients that have requested a public IP address and want to reside behind the Nomadix device.
This set up will work for clients that want to have all their network separated sitting behind the Nomadix whilst being rate limited.
Notes
You must ensure you are using a VLAN that is not already defined in the port-location section.
You must not use the native default VLAN
You must use a VLAN - in the below example VLAN 303 is used to tag towards the Nomadix and untagged towards the customer Firewall.
Set Up:
You will need to follow the below steps to enable this feature on the Nomadix gateway.
Step 1:
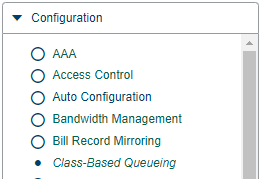
To rate-limit the user you will need to create a bandwidth class plan that can be assigned to them. You will need to navigate to configuration then class-based queueing.
Class-based queuing will then need to be enabled.
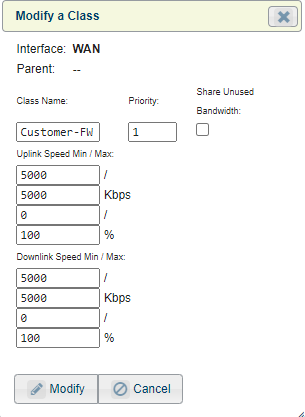
You will then need to select add class under the WAN interface.
Fill in the details related to the customer requirements
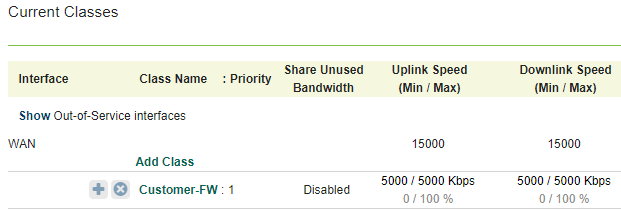
You will see the Bandwidth class has been created in the table.
Step 4:
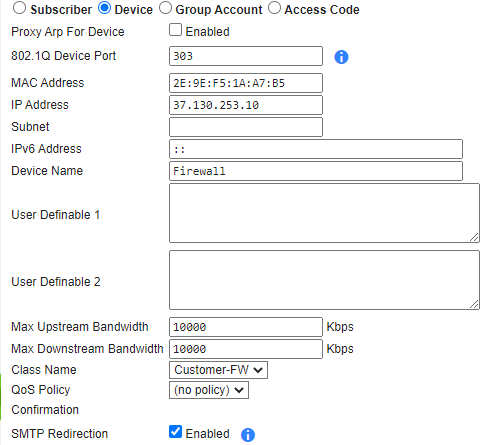
Find MAC address of the device under Subscribers > Current and add it as a device with an IP address, BW class etc, sync database similar to the below.
Please note the Max Upstream and Max Downstream bandwidth must be set to the maximum value.
