WatchGuard - Rate Limiting - Per Policy
In some scenarios, it is necessary to apply a rate limit to a policy or individual subnets in this guide we cover the "Per Policy" rate limit where each policy can individually use a maximum limit defined by you.
All configuration will be performed via the WatchGuard Policy Manager
Configuration:
Step 1 - Define Outgoing Bandwidth
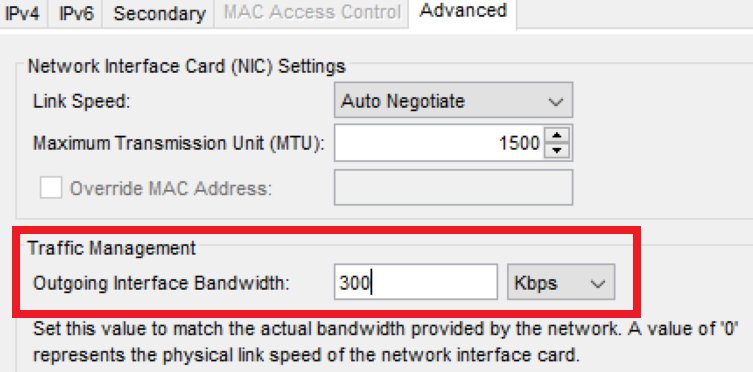
Some traffic management actions require the outgoing bandwidth to be set this is always considered the upload speed.
Select your External Interface > Advanced > Set Upload Speed (In this example we have 300Mbps)
Step 2 - Enabling Traffic Management
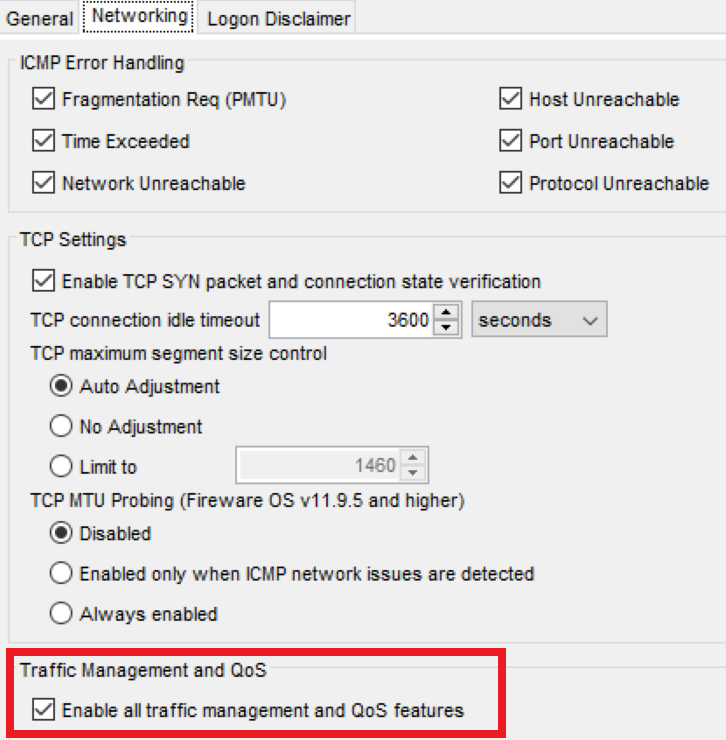
The traffic management and QoS features must be enabled in order for the Rate Limit to apply.
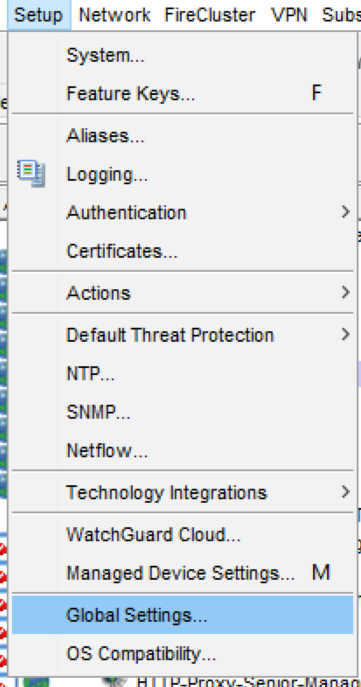
Setup > Global Settings > Networking > Enable all traffic management and QoS features
Step 3 - Define Traffic Management Policies
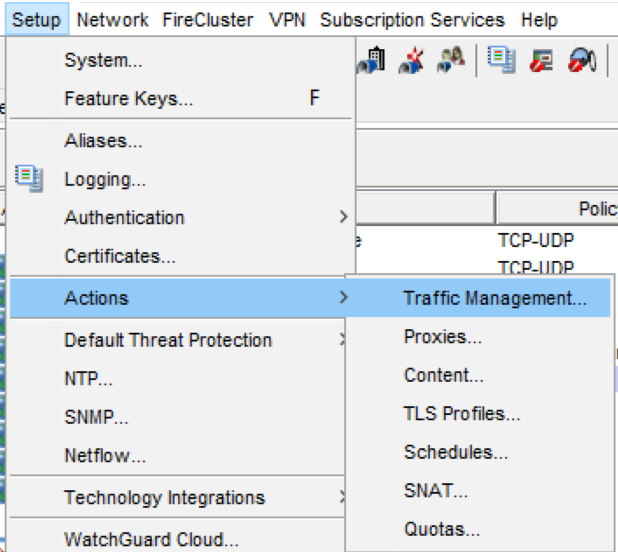
Setup > Actions > Traffic Management > Add
Next we will create two different policies one will be for upload and one will be for download which will be explained in the next section when we apply to a policy.
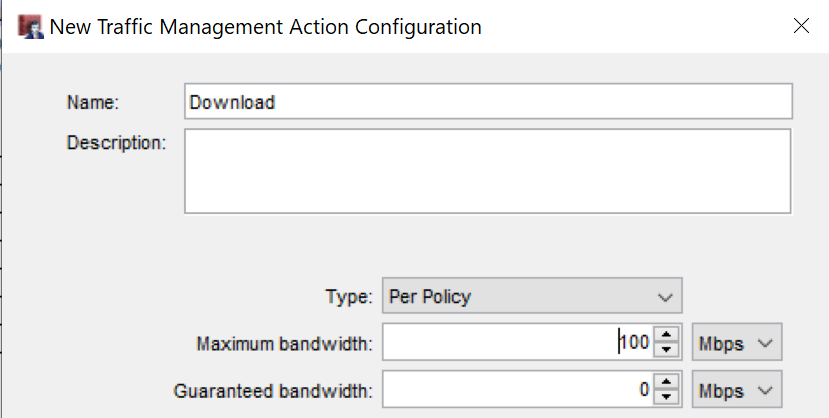
Download Action
We have set the Type to be Per Policy and the Maximum bandwidth to 100Mbps
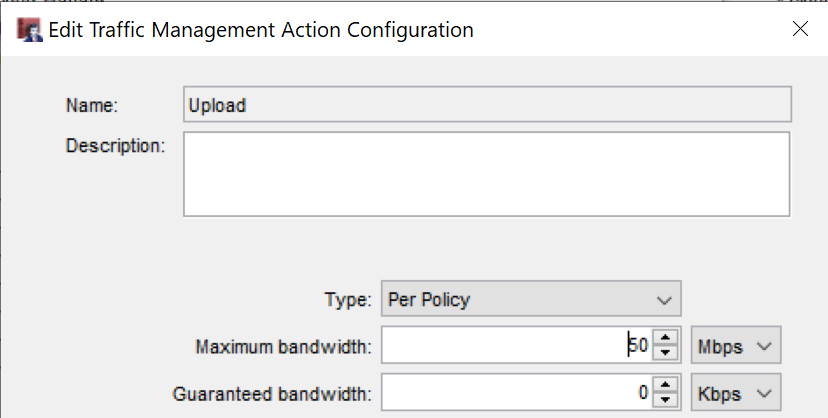
Upload Action
We have set the Type to be Per Policy and the Maximum bandwidth to 50Mbps
Step 4 - Applying to a Policy
Before we apply to a policy its important to note the direction of traffic and how the policies are applied.
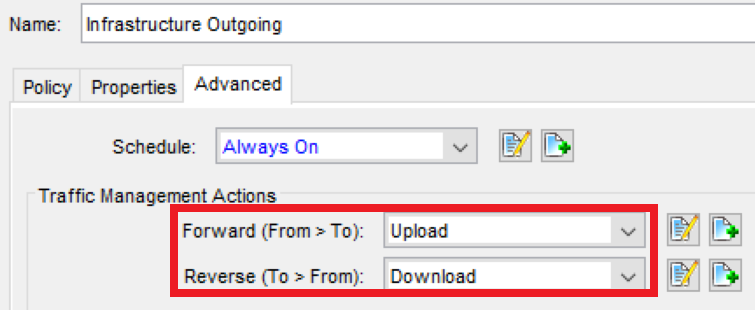
Forward Action - Applies to traffic that originates from the From list (Source - Upload)
Reverse Action - Applies to traffic that originates from the To list (Destination - Download)
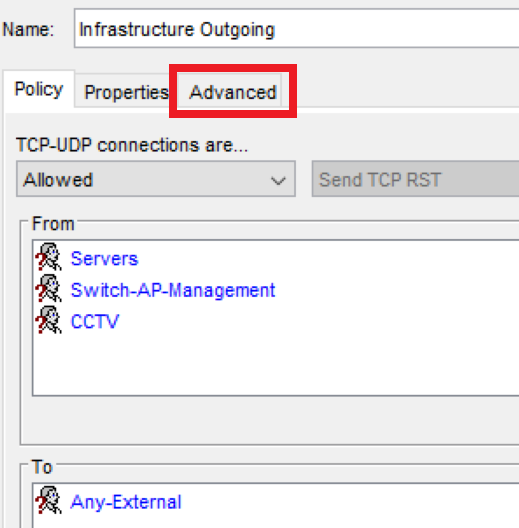
Select or create a policy, in this case I will be using an existing policy called "Infrastructure Outgoing" which is a TCP-UDP Policy, traffic management could be applied to any policy such as an HTTP(S) for example.
Select the Advanced Tab
Next Select the Traffic Management Action
