Nomadix - Integration with the Ruckus Smartzone
Smartzone Setup:
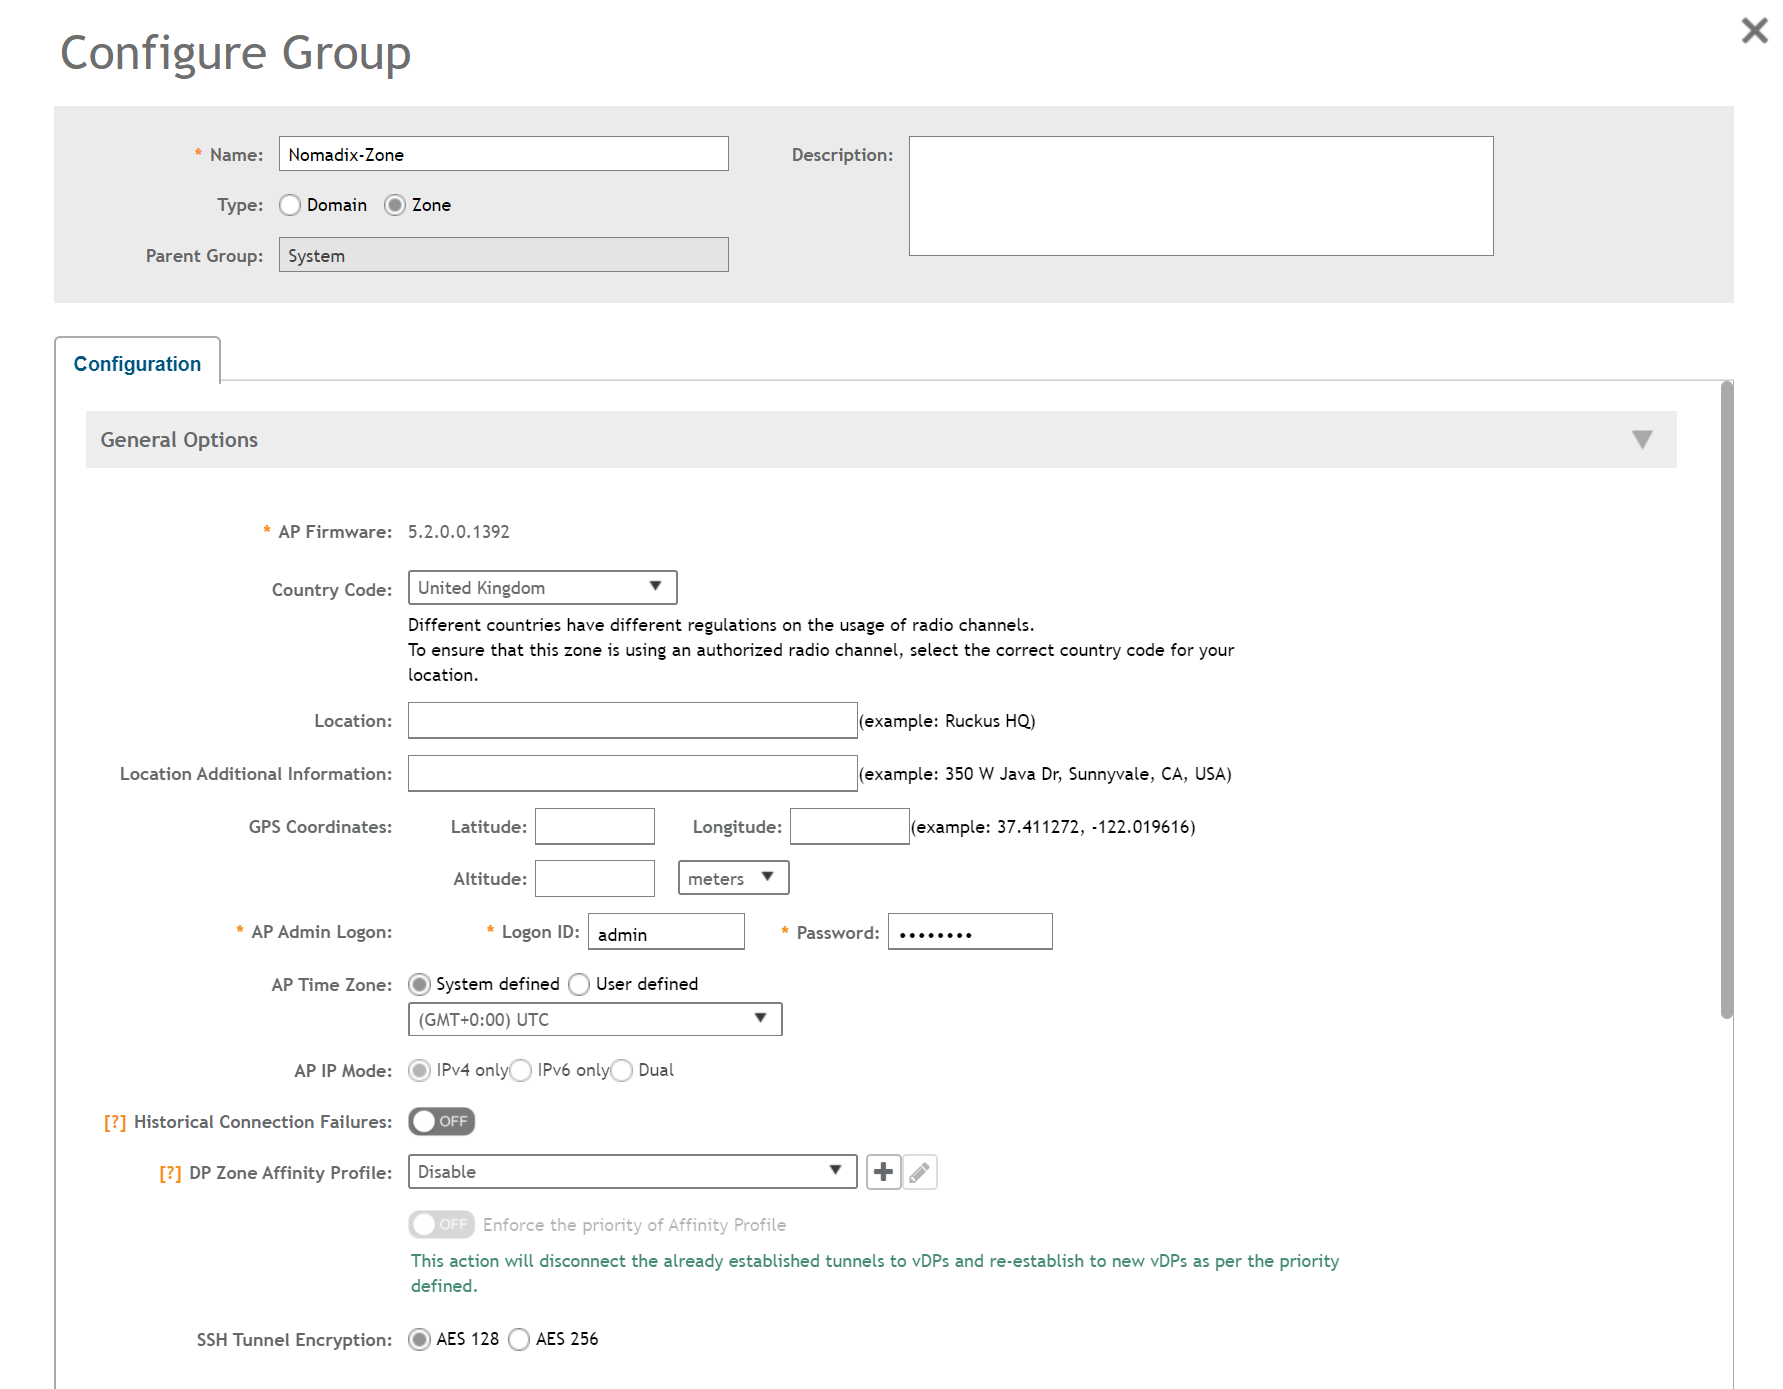
Step 1- Once logged into the Smartzone you will need to go into wireless LAN's and then select the + icon to create a zone.
Step 2- When creating the zone you will need to enter the relevant details as well as the username and password.
Step 3- In the zone that has been created, you will need to create an SSID, this can be done by selecting the zone and then pressing create. The name of the SSID will be based on your own requirements and the authentication type should be set to standard. The authentication method should be left as open, the encryption type set to WPA2, a passphrase should be entered which will be based on requirements, and the dynamic PSK should be set to internal.
Step 4- Once the details have been filled in you will see that the SSID has been created under the zone and put into the default WLAN group.
Nomadix Setup:
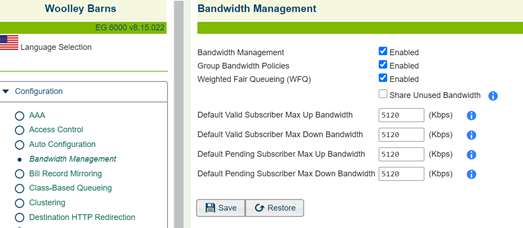
Step 1- In Configuration--> Bandwidth Management you can enable BW management and control the BW settings for subscribers.
Step 2- In Configuration--> Port Location you will need to select 802.1Q two-way which enables the Nomadix gateway to see VLAN headers within IP packets
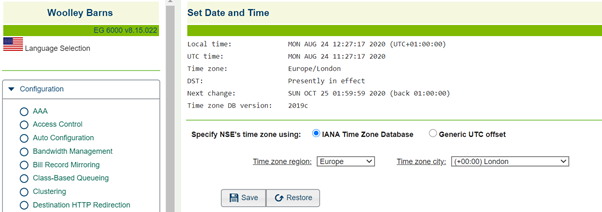
Step 3- In Configuration--> Time you will need to set the right time and zone, in this section it’s important to make sure all the time settings are correct.
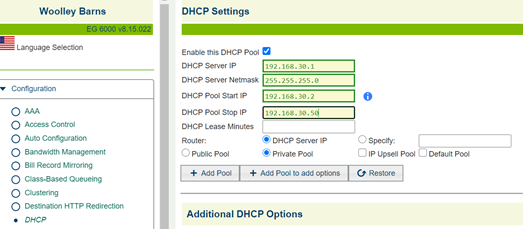
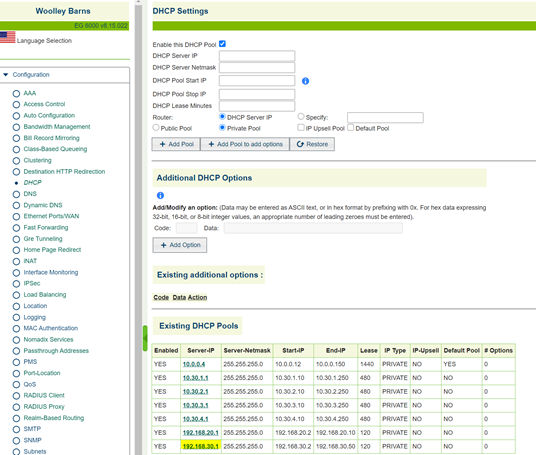
Step 4- In configuration-->DHCP-->Add you will need to create a DHCP pool which will allow users to get an IP address. When you have selected add you will need to fill in the necessary details then select add pool.
Step 5- Under the DHCP configuration you will see that the pool has been created.
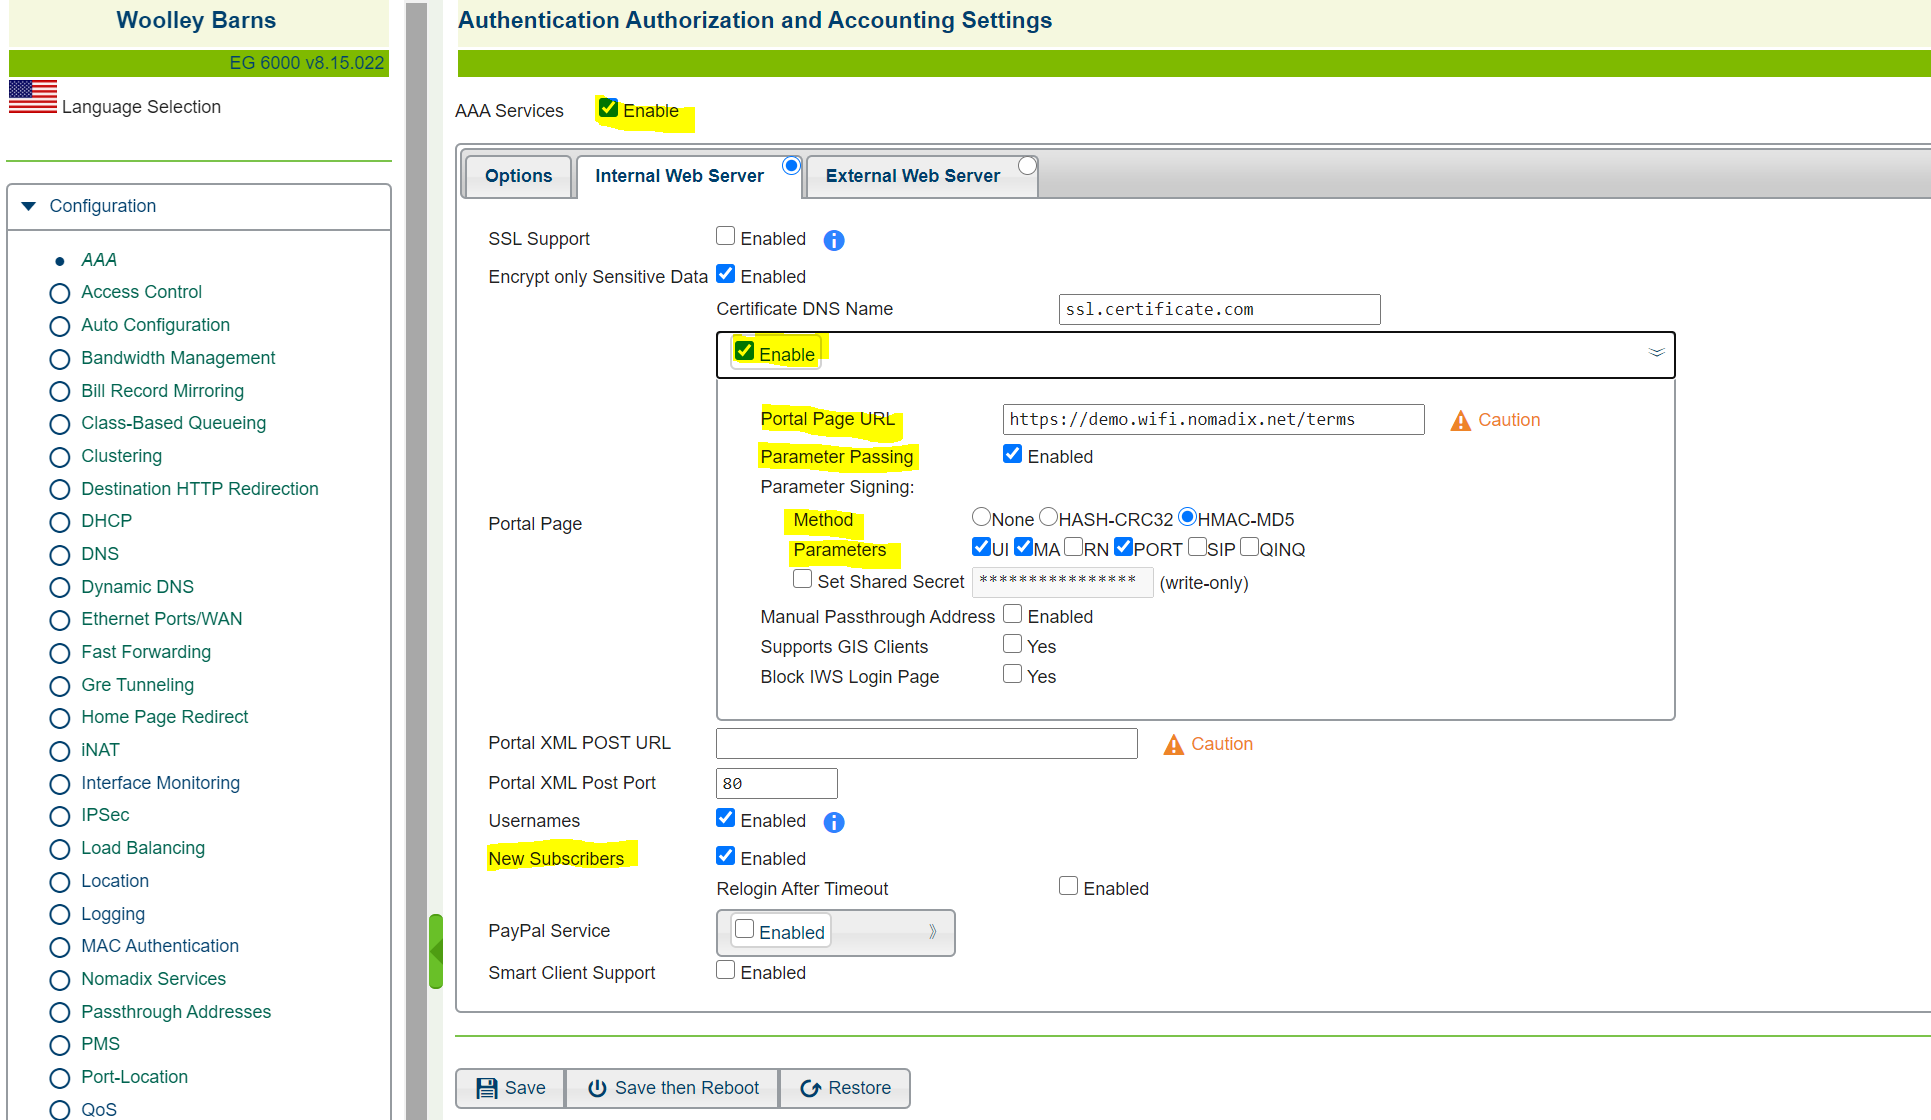
Step 6- When a DHCP pool has been created you will need to go into Configuration-->AAA-->Internal Web Server to fill in the details for the portal page. You will need to add in the portal page URL as well as enable AAA, parameter passing, HMAC-MD5 for the signing method, and new subscribers. For parameters tick UI, MA, and PORT and you should also set the shared secret before selecting save.
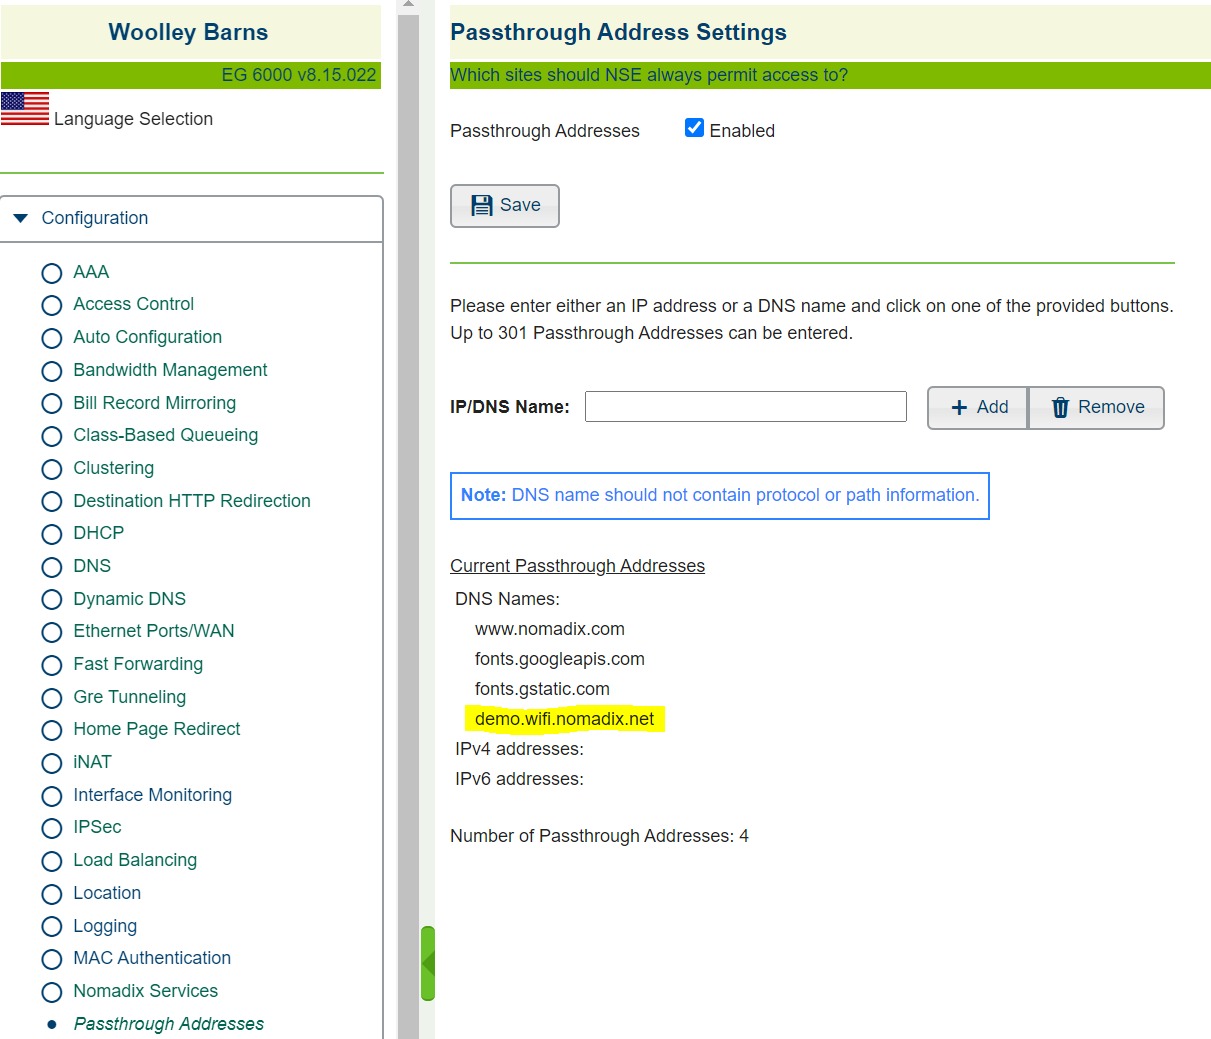
Step 7- When you have selected the save button you will need to go to Configuration-->Pass through Addresses. Then add the URL link used under the portal page URL in the previous section to the IP/DNS name. When this has been completed select add and you will see it added to the list of pass-through addresses.


