Nomadix - PMS Access Codes
Nomadix initial set up:
Step 1:
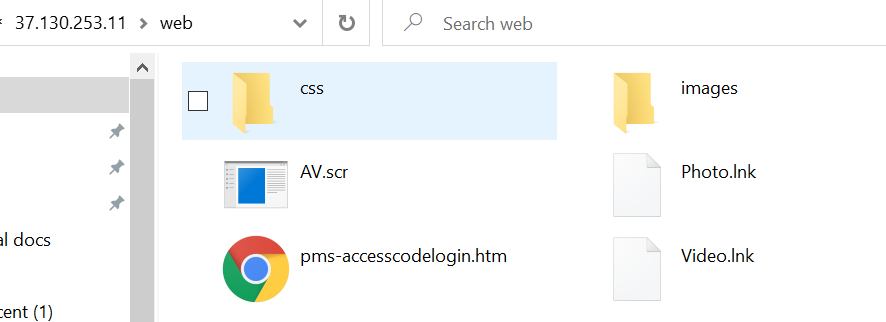
The first step in this process will be to FTP the correct files to the gateway. To do this you will need to log into the gateway via FTP and then go into the web directory.
Step 2:
Once in the web directory you will need to upload the pms-accesscodelogin.htm file as well as create two separate folders. One will be called css and the other is called images.
Step 3:
The next step will be to move pms-accesscodelogin.css into the css folder, you then need to put loginBackground.jpg and loginLogo.png into the images folder.
css:
Images:
Step 4:
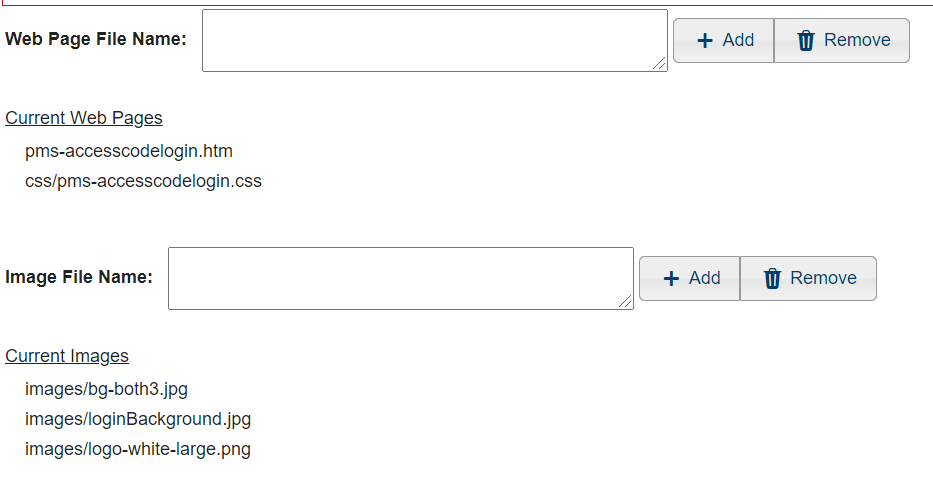
The last step you will need to add the web page and image files into the Nomadix gateway, you can do this under subscriber interface-->Local Web Server.
Nomadix next steps:
Step 1:
The first step you will need to go into configuration-->AAA-->Internal Web Server. When you are in the AAA tab you need to enable AAA services and then under internal web server you need to enable the portal page. Once enabled you will need to go into the portal page section and in the portal page URL box you need to put http://login.nomadix.com:1111/web/pms-accesscodelogin.htm. This will point it to the PMS portal template, you also need to tick parameter passing and tick enable new subscribers.
Step 2:
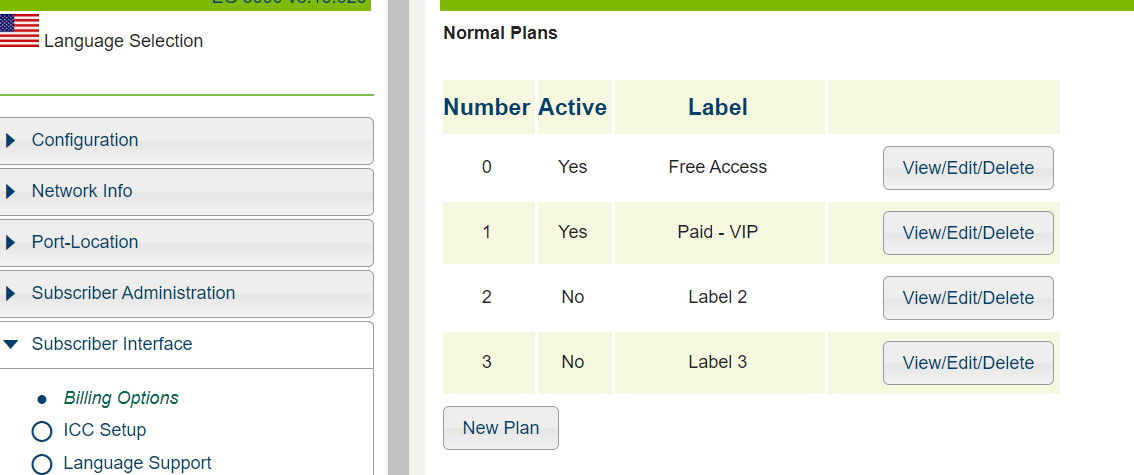
You then need to configure a billing plan via Subscriber interface-->Billing Options. This will be the page you're presented with when selecting it. The billing plan 0 will be used when trying to use access codes with PMS.
Step 3:
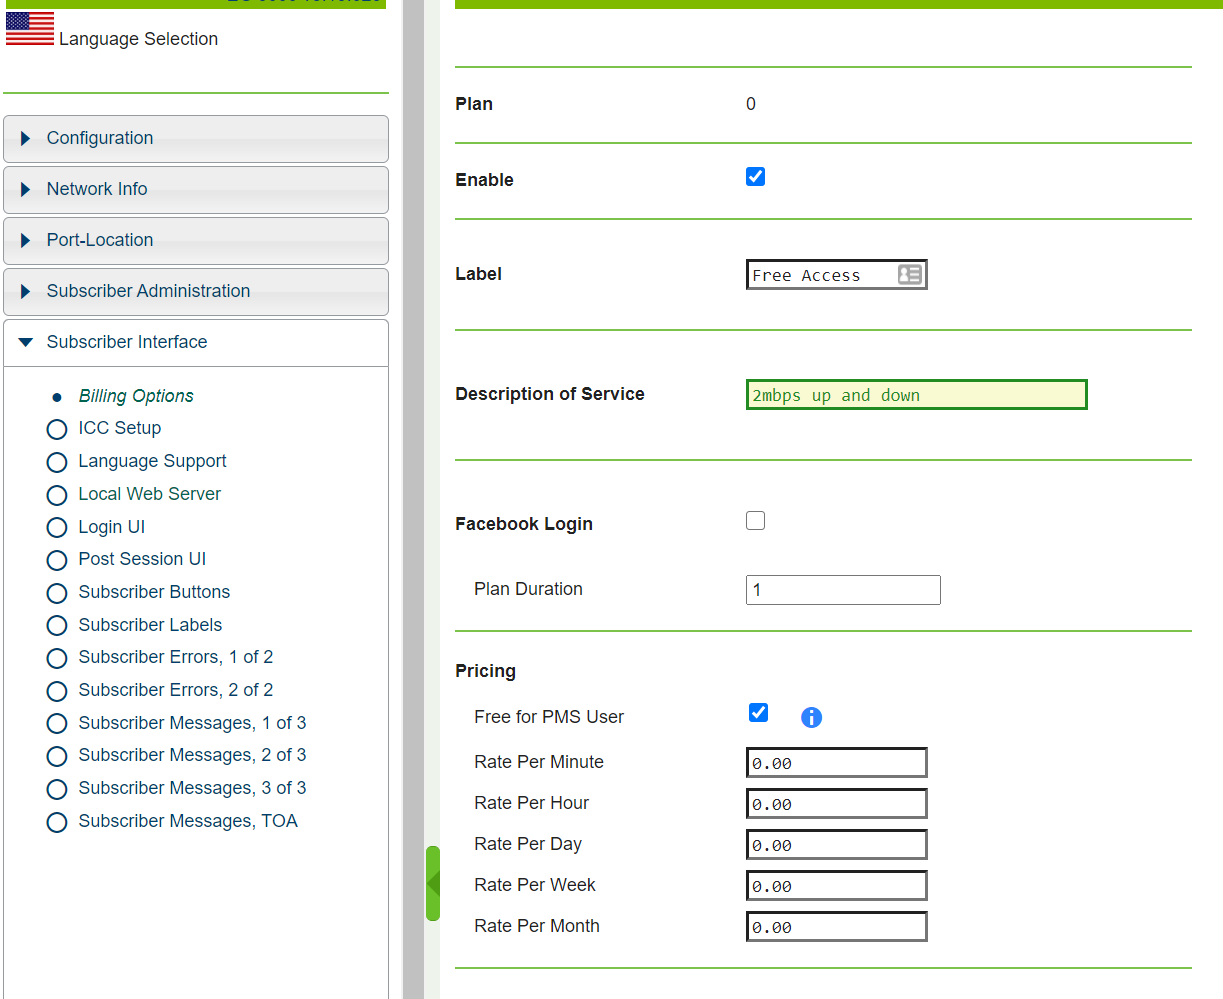
Under plan 0 you will need to select view/edit/delete to go into the plan and make any changes. This section will be different depending on customer requirements, for this we have gone with the no charge route. The Free For PMS user has been selected which means the user won't be charged when trying to onboard to the WI-FI. If you want to charge customers you will need to put a sum in the pricing section under Minute, hour, day etc depending on the charge plan.
Step 4:
An access code will then need to be created by going to subscriber administration-->access codes-->Then select the page icon. When you are creating the access code information you can include a bandwidth class, which can be created under class based queueing under configuration. You can also give the amount of devices that will use the code, how the access code will look, the session time, when it needs to be activated by etc. Once complete you will need to select save.
Step 5:
When you select save you will be presented with the below screen which validates the access code has been created.
Step 6:
You can then select the access code and select the printer icon which will give you the below screen showing what the access code will look like. This is the code the client will need to input when connecting to their WI-FI and it can be printed for them
Step 7:
The final step will be to enable suppress posting of zero payment which sits under configuration-->PMS-->Miscellaneous settings.
Step 8:
Now all the steps are complete you can now connect to the SSID created for guests, this will then bring up a web page. This will be where you input the access code to onboard you onto the WIFI.
