
Cambium cnMaestro - Migrating from cnMaestro Cloud to cnMaestro On-Premises
This guide walks through moving a network's configuration and devices from cnMaestro Cloud to a cnMaestro On-Premises instance: back up the cloud account, export its WLAN and group configuration, import that configuration on-premises, then delete and factory reset the devices so they can be re-onboarded to the new instance.
Before you start
A cnMaestro On-Premises instance already deployed and connected to a Cloud Anchor account (see Deploying a New Instance and Disconnecting from the Cloud) — keep that cloud connection in place until this migration is finished. Onboarding devices to On-Premises requires an active connection to Cambium Cloud, so don't follow the severing guide until every device below has been onboarded.
Admin access to both the cnMaestro Cloud account and the On-Premises instance.
A maintenance window — devices go offline between being deleted from Cloud and coming back online on-premises.
NSE devices can't be migrated this way. cnMaestro On-Premises does not support Cloud Sync for NSE devices.
Migrating Cambium Devices
Step 1: Take a full inventory backup
Before making any changes, export a full inventory of the account from cnMaestro Cloud so you have a record of every managed device to bring across. The System Backup and Restore feature is only available on cnMaestro On-Premises, so on the Cloud side this is done from the Inventory page instead.
In cnMaestro Cloud, go to the Inventory page.
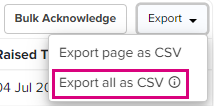
Click the Export dropdown above the device table and select Export all as CSV — not Export page as CSV, which only exports the currently visible page. A message confirms the data is being prepared.
Click the Download Manager icon in the bottom-left of the page to track the export.
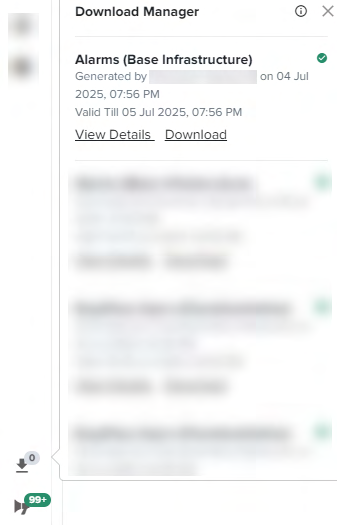
Once the file is ready, click Download to save the CSV locally. Generated export files are only available for 24 hours, so download it promptly.
This CSV is your record of every device in the account (name, MAC address, serial number, site, model, and more) before migration — keep it somewhere safe so you can cross-check against what gets onboarded on-premises later.
Step 2: Export WLANs, AP Groups, Switch Groups
Export each type of shared configuration separately — WLANs and AP Groups don't bundle together, so pull both.
WLANs and AP Groups
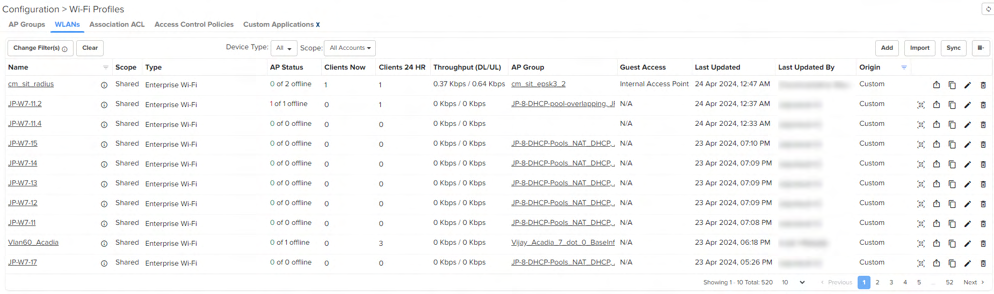
Go to Configuration > Wi-Fi Profiles.
Select the AP Groups or WLANs tab.
Click the export icon in the row for each profile you need to migrate. Files download as JSON, named with a timestamp.
Switch Groups
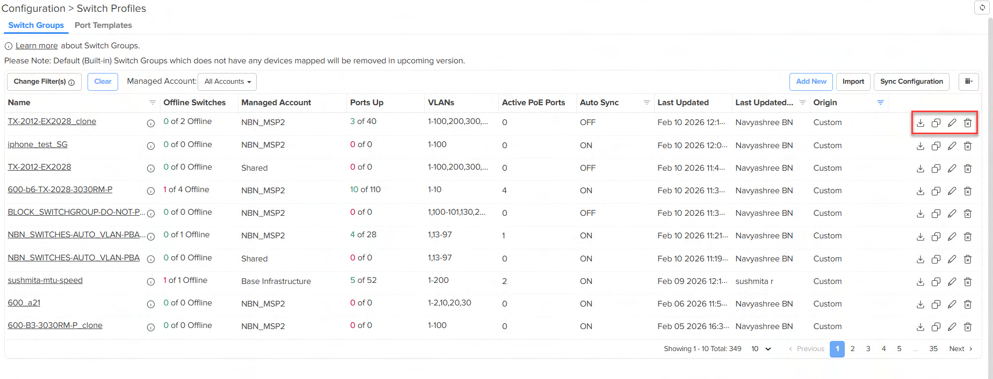
Go to Configuration > Switch Profiles > Switch Groups.
Click the export icon in the row for each Switch Group.
NSE devices can't sync to an On-Premises instance, so there's no supported export/import path for NSE Groups.
Step 3: Import the configuration into On-Premises
With the exported JSON files in hand, log in to the On-Premises instance and import each one.
WLANs and AP Groups
Go to Configuration > Wi-Fi Profiles.
Select the AP Groups or WLANs tab and click Import.
Enter a name, select the Managed Account, choose the JSON file, and click Import.
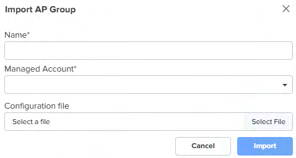
Import WLANs before the AP Groups that reference them — importing an AP Group fails if its associated WLAN isn't already there.
Switch Groups
Go to Configuration > Switch Profiles > Switch Groups and click Import.
Select the Managed Account, choose the exported JSON file, and click Import.
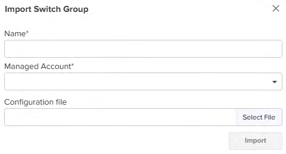
Step 4: Factory reset the devices, then delete them from cnMaestro Cloud
Factory reset each device before removing it from cnMaestro Cloud — once a device is deleted, its Configuration page (and the Factory Reset option) is no longer available, so reset has to happen first.
Factory reset each device
Open the device's Configuration page and expand Factory Reset.
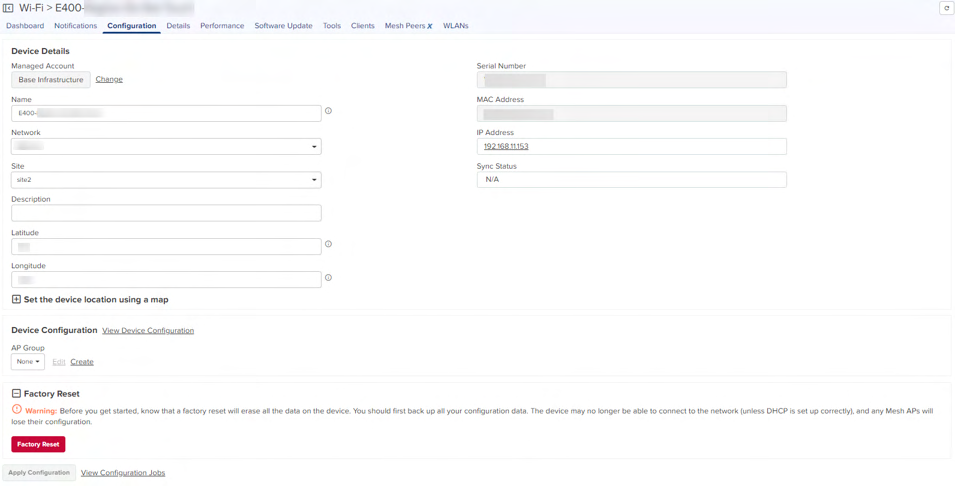
Click Factory Reset, then confirm.
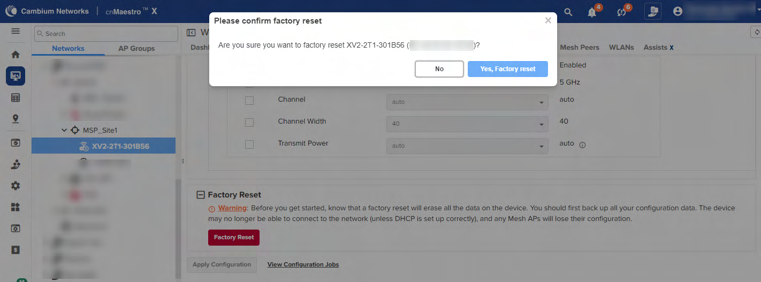
cnMaestro's UI only supports factory reset for Enterprise Wi-Fi (3.10-R6 and later) and cnMatrix (4.0 and later). For other device types, use the device's own local reset method (console, reset button, or local UI) before deleting it from cnMaestro.
Delete from cnMaestro Cloud
Once every device has been reset, go to the Cloud Anchor account's Inventory page (or Onboard > Devices for unmanaged devices).
Select the checkboxes for the devices you're migrating and click Delete.
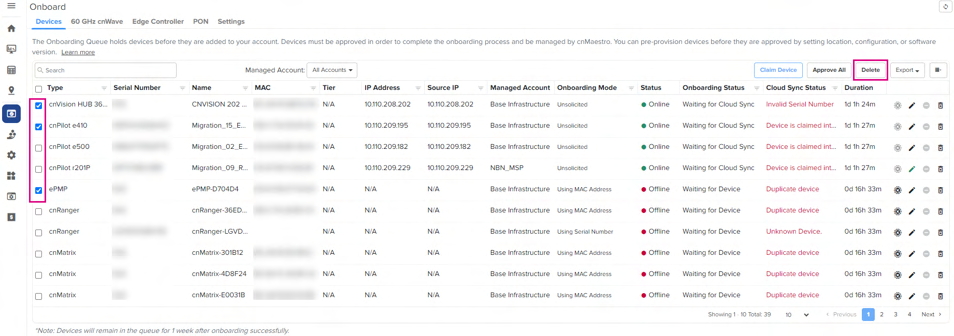
Confirm the deletion. cnMaestro creates a job for it under Administration > Jobs > Actions, which you can check if anything fails to delete.
Step 5: Onboard the devices to On-Premises
Once a device is factory reset, it looks for a management server in this order: a URL configured directly on the device, then DHCP Option 43, then DHCP Option 15. If none of those are set, it falls back to cnMaestro Cloud.
To point freshly-reset devices at your On-Premises instance instead, configure your DHCP server to hand out Option 43 with the On-Premises Management URL (for example, https://<on-prem-hostname-or-IP>) for the scope those devices sit in. This is the quickest option since it needs no per-device configuration — Option 15 (domain-based) and a static per-device URL are the alternatives if Option 43 isn't practical on your DHCP server.
Keep the On-Premises instance connected to Cambium Cloud while you do this. Onboarding devices to an On-Premises instance requires that instance to have an active connection to a Cloud Anchor account — devices won't onboard if it's disconnected. Only follow the severing guide once every device from this migration has been onboarded and approved.
As devices come back online, they'll appear in Onboard > Devices on the On-Premises instance, where you approve them the same way as any new device.